Reviving the Classic PC Case
Almost 20 years ago, I participated in a PvP competition tournament for Final Fantasy XI, a MMORPG, within the in-game PvP event called Ballista. The tournament spanned across all servers, divided up between the different primary regions (North America and Japan). Throughout the tournament, each winner from each server (from about 30~ servers or so for North America) competed, and culminated to the final match, played at the Fan Fest in 2006.
Our team from the server Siren ended up playing the team from the Phoenix server for the North America championship, and we were able to come out victorious!


Yea, I’m exposing myself with those pictures 😮💨
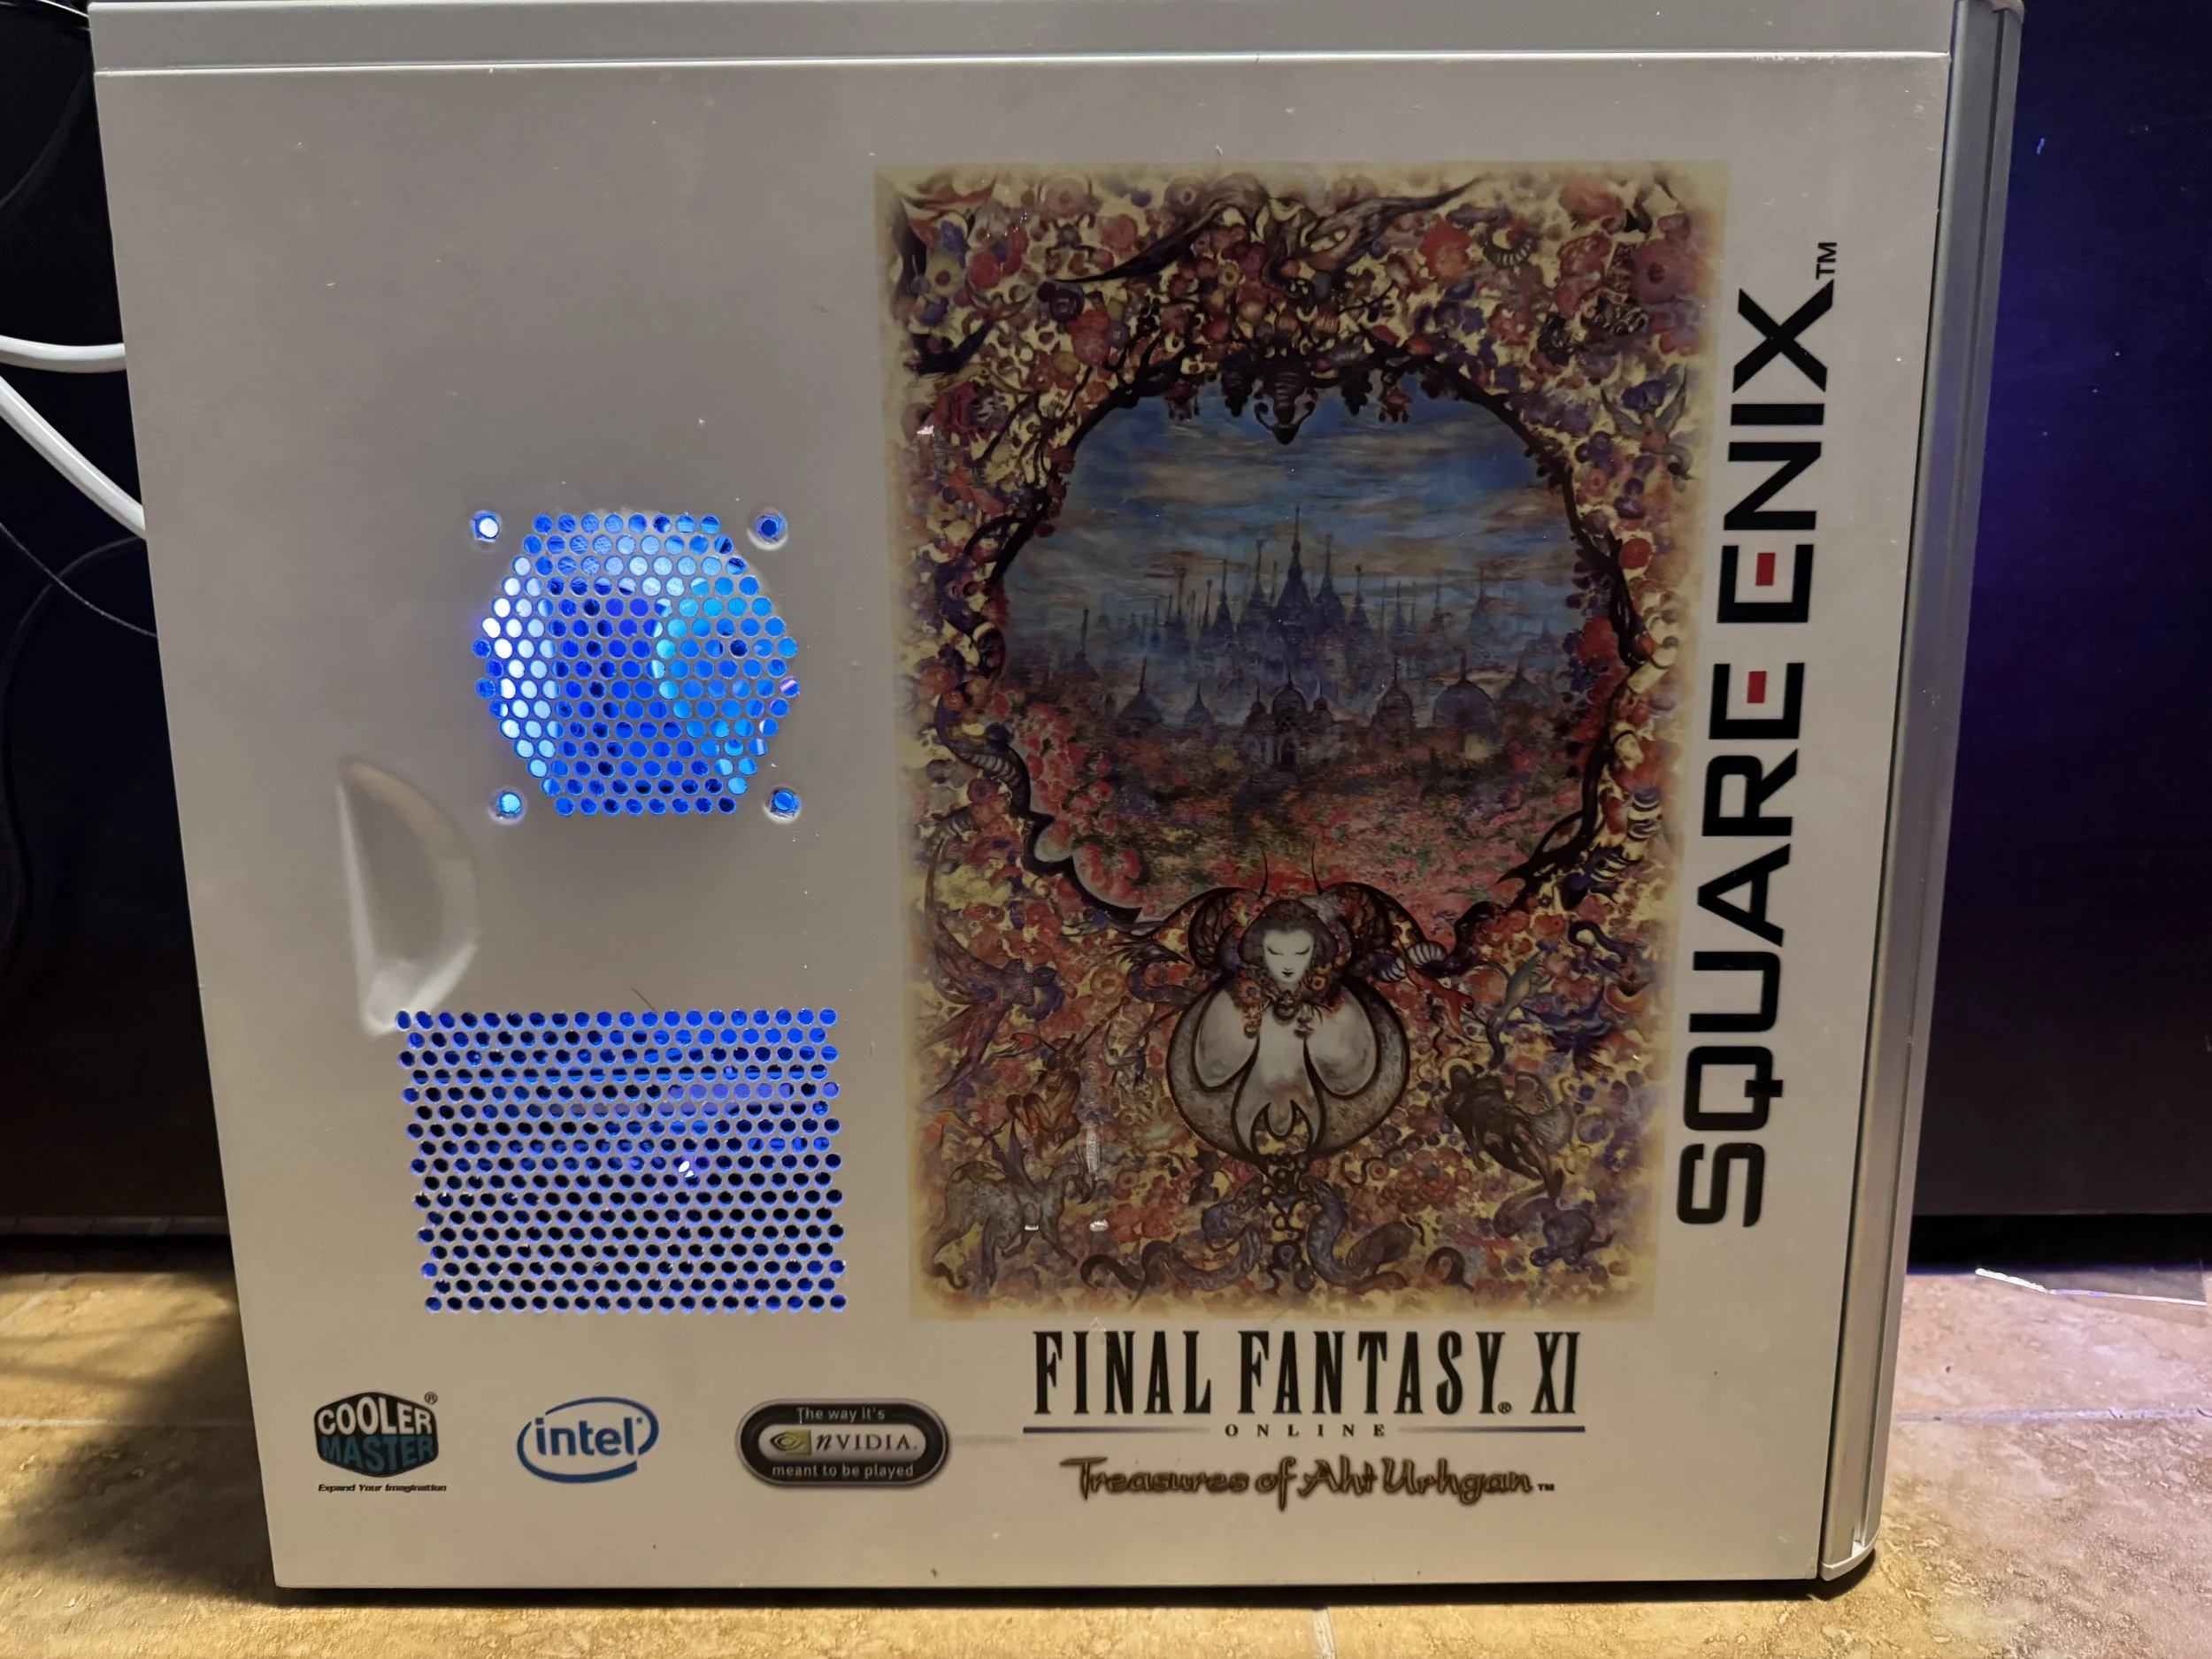
The grand prize for winning the tournament was a custom PC with art from the new expansion, Treasures of Aht Uhrgan.


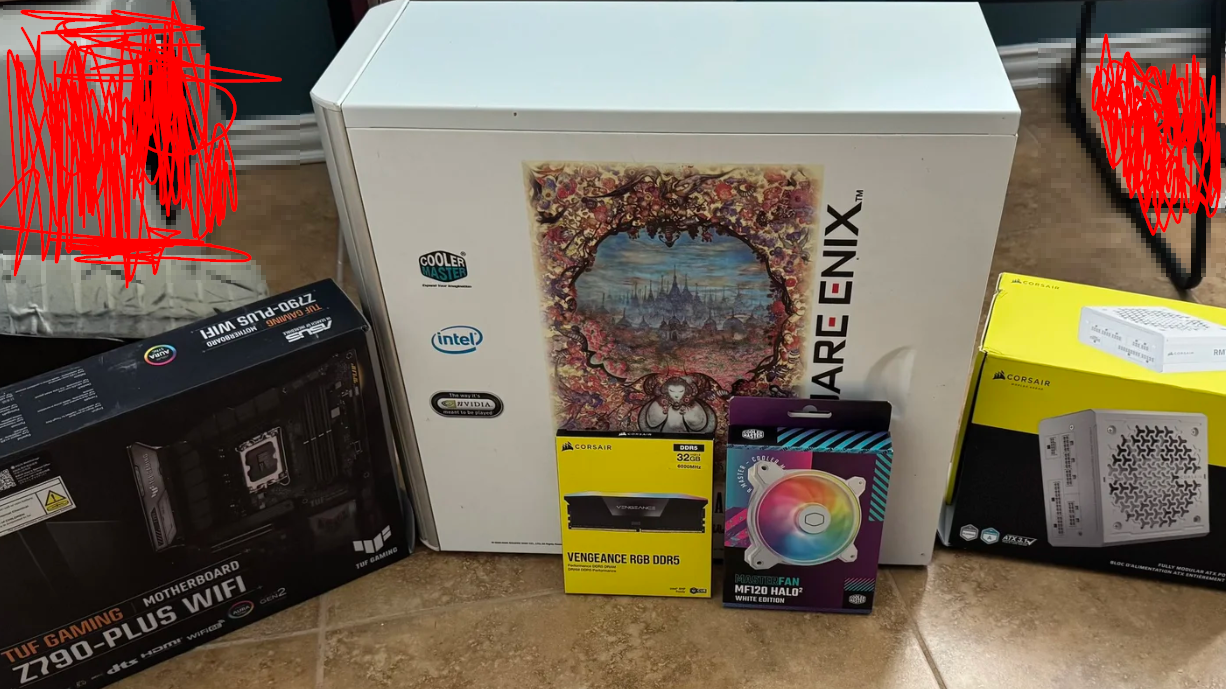
Current pictures of the case, although a bit dusty and worse for wear.
At the time, the PC was pretty modest and capable of running the popular titles at the time. However, after a few years, the PC wasn’t getting used as much and ended up regulated to being a neglected relic that I carried around throughout my life.
I always told myself that I’d use the case again with rebuilt parts someday, and didn’t really have the heart to get rid of it. I felt like it was a solid case that still held value to me.
I was moving stuff away from the corner it was stashed in, and finally took on the task.


Most of the items inside the PC had been taken out, and what remained were the motherboard, fans, and power supply unit (PSU), all of which were very old at this point.
In addition, taking on this task in 2025 meant some challenges on how it was built:
- Cases today are much more modular and insulated. This case is made out of metal, with rivets fastening some parts together.
- Some of the screws were difficult to reach by conventional screwdrivers, requiring very small (0.5in) right-angle screwdrivers.
- Much of the existing wires were hard to manage.
- Many modern video cards (graphical processing units/GPUs) did not fit comfortably into the case due to the configuration.
- The ability to place fans in different places is difficult due to the limitations.
Cases have come a long way in the past 20 years.
With our limitations set, it was time to draft the parts list for the rebuild:
CPU: Intel Core i5-14600K
GPU: ASUS GeForce RTX 3060 OC 12GB
Motherboard: ASUS TUF Gaming Z79o-Plus WiFi
RAM: 32GB Corsair DDR5 6000MHz
Storage: 1TB WD BLACK NVMe SSD
PSU: Corsair RM750e
CPU Cooler: Thermaltake TH120 V2 ARGB AIO
Additional Fan: Cooler Master MF120 Halo2 ARGB
The rebuild begins
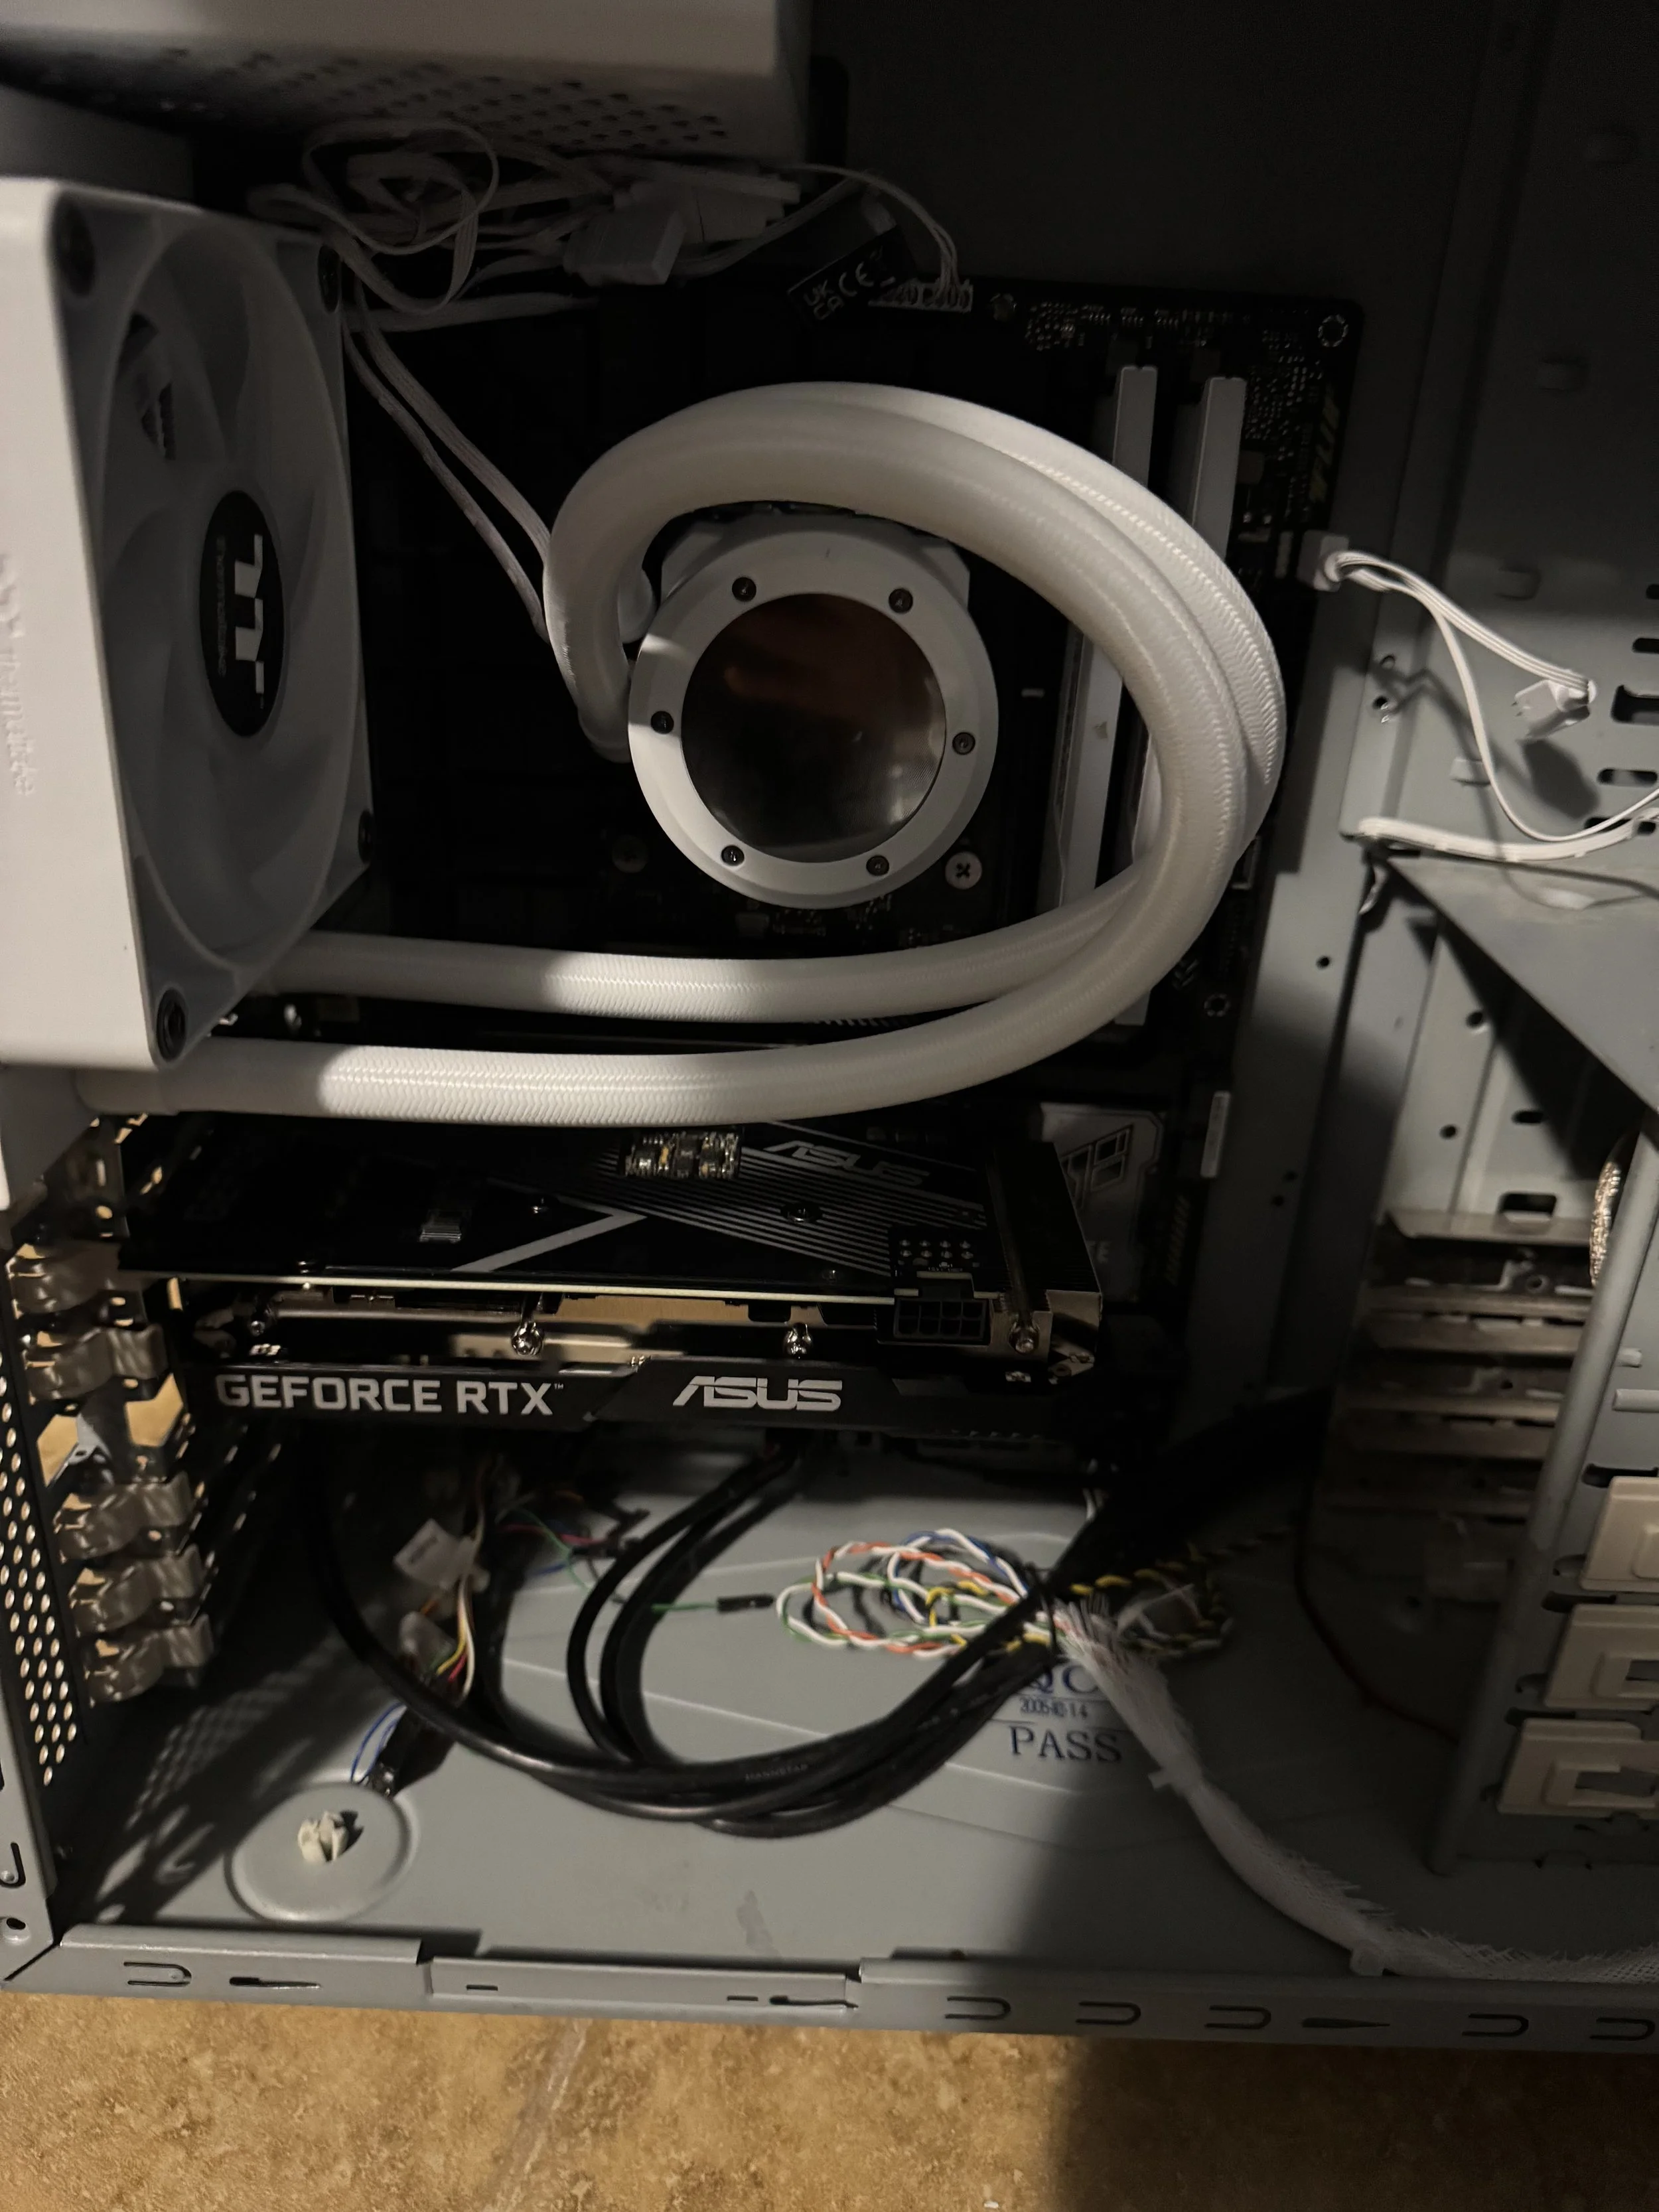
Much of the beginning of the assembly went smoothly, the motherboard matched the previous one’s dimensions. The PSU, although mounted on the top, wasn’t an issue either.

Where I ran into a major problem was the 5.25in slots. The bays themselves were attached to the inside to the case by several rivets. If you haven’t had to deal with getting rivets out before… good. There’s no clean way to get them out, and usually needs something like grinder, or a drill, to get them out.
I didn’t have a grinder at the time, but I did have a drill, and attempted to get them out via this method. After burning through quite a bit of a drill bit, I was able to get out one rivet.
One.


Typically, I wouldn’t mind going through getting all of the rivets out, although, many of them were at funny angles, which left it to the imagination how they got there in the first place.
With that being said, I had a main priority to make sure I didn’t damage the case in any way. I didn’t carry it for almost 20 years across the world just to destroy it. So, I adapted.
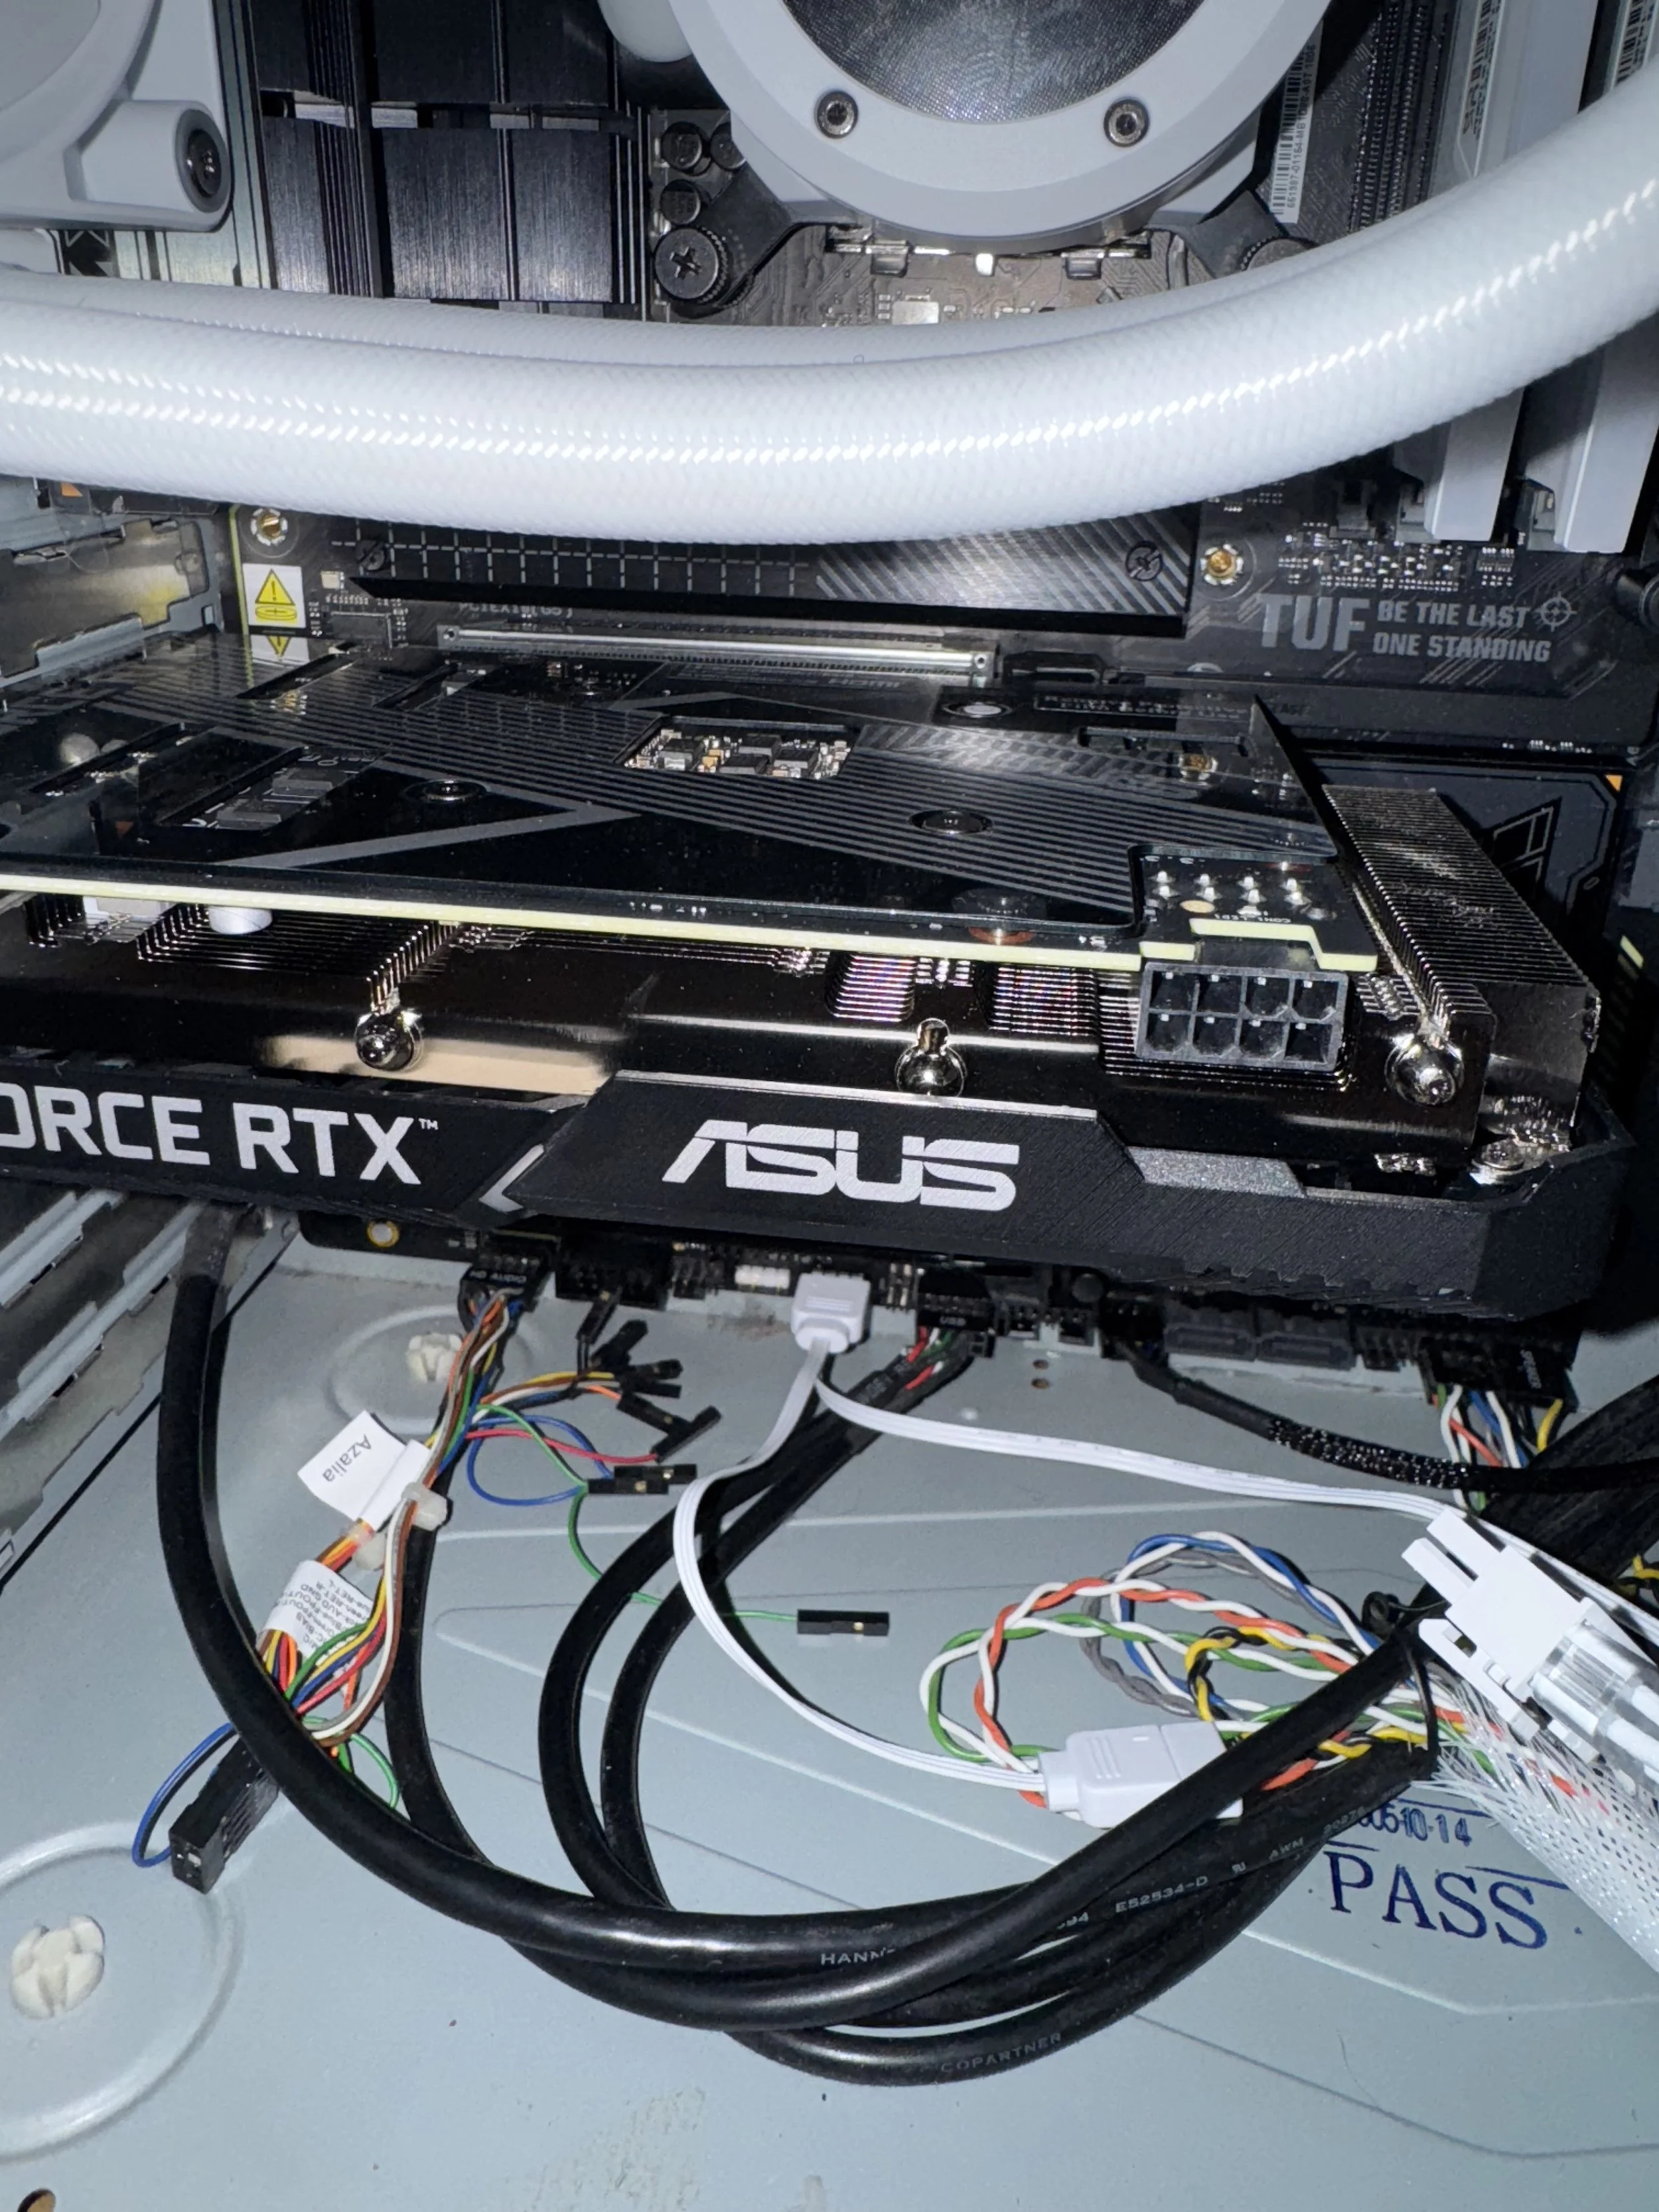
This meant that I needed to find GPUs that could fit into the case comfortably. I had an older 3-fan GPU that I attempted to put into the case, but because it was too large to fit comfortably, I went with the 2-fan ASUS option.
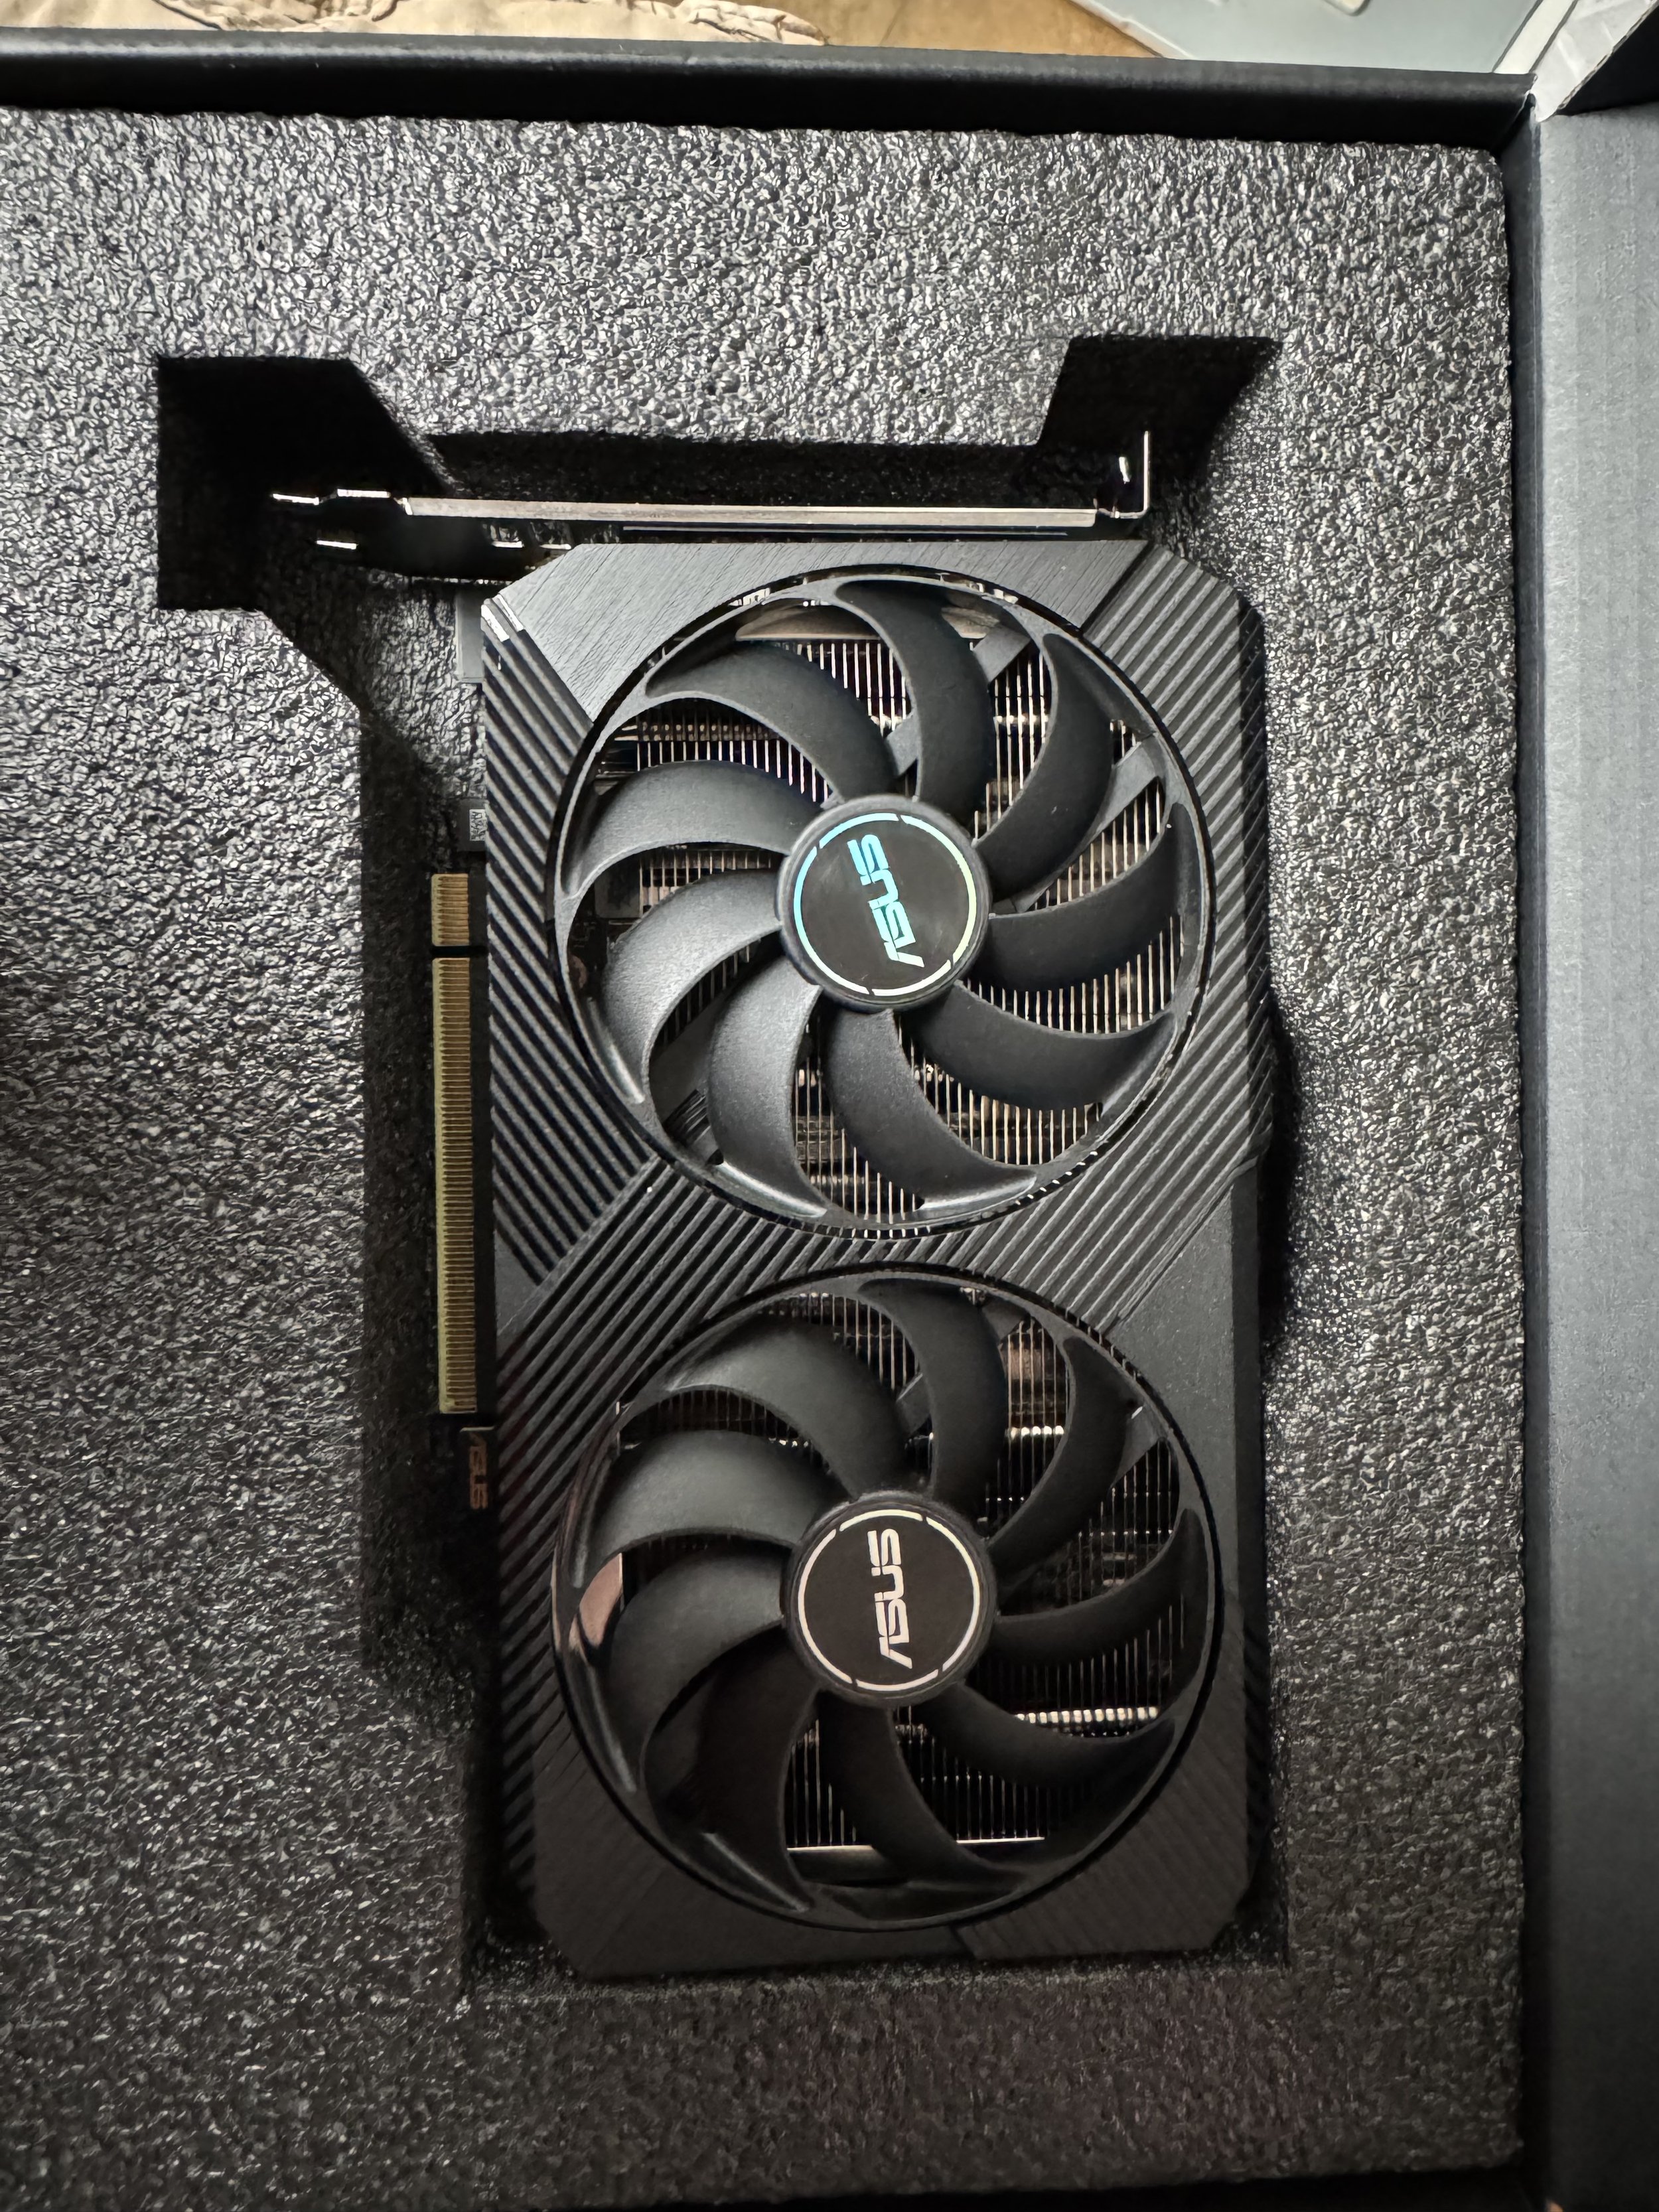
ASUS GeForce RTX 3060 OC 12GB
Another constraint was the metal grates in front of the bays. These grates were directly attached to the front, behind the front metal mesh, and are also fastened by rivets (ugh).


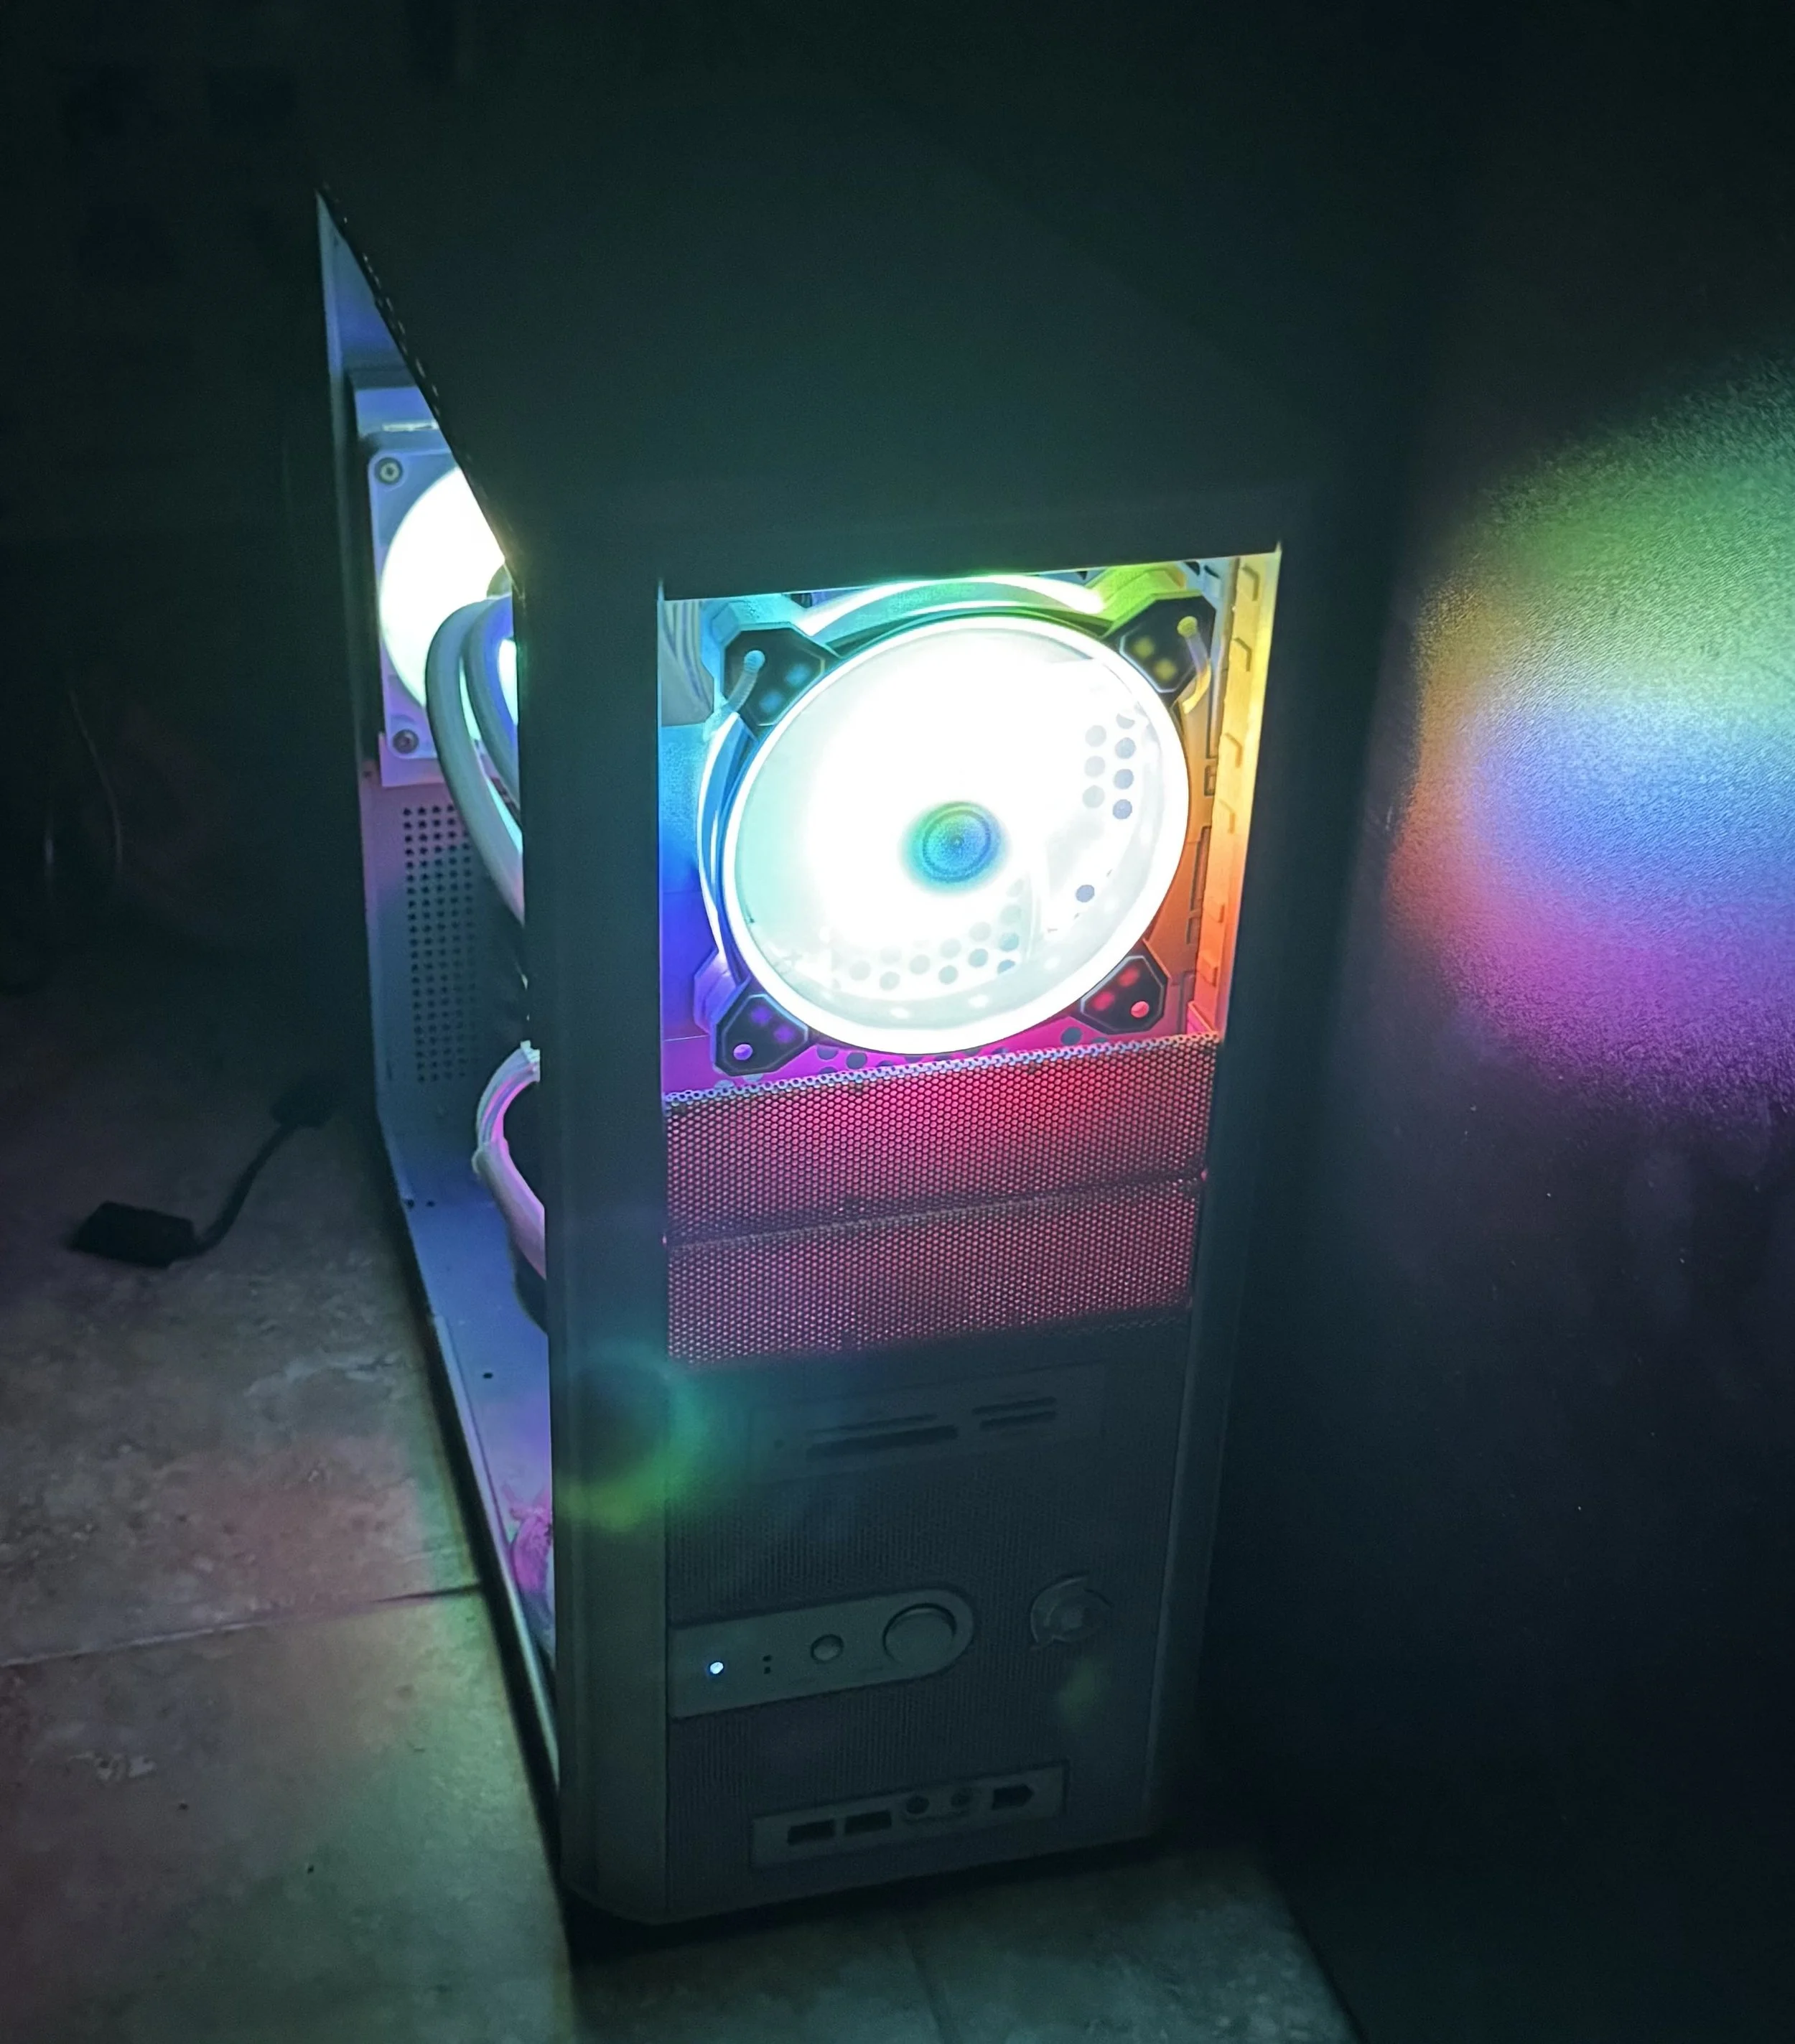
I wanted to use the space to mount a fan in the front, as there are not a lot of options elsewhere on the case. I also wanted to attempt to give the case some flair as well.
Luckily, I could mount the fan on the metal grate, using some zip ties on the top part.
This requiring removing the most annoying screw though to access the front panel to remove the front mesh.
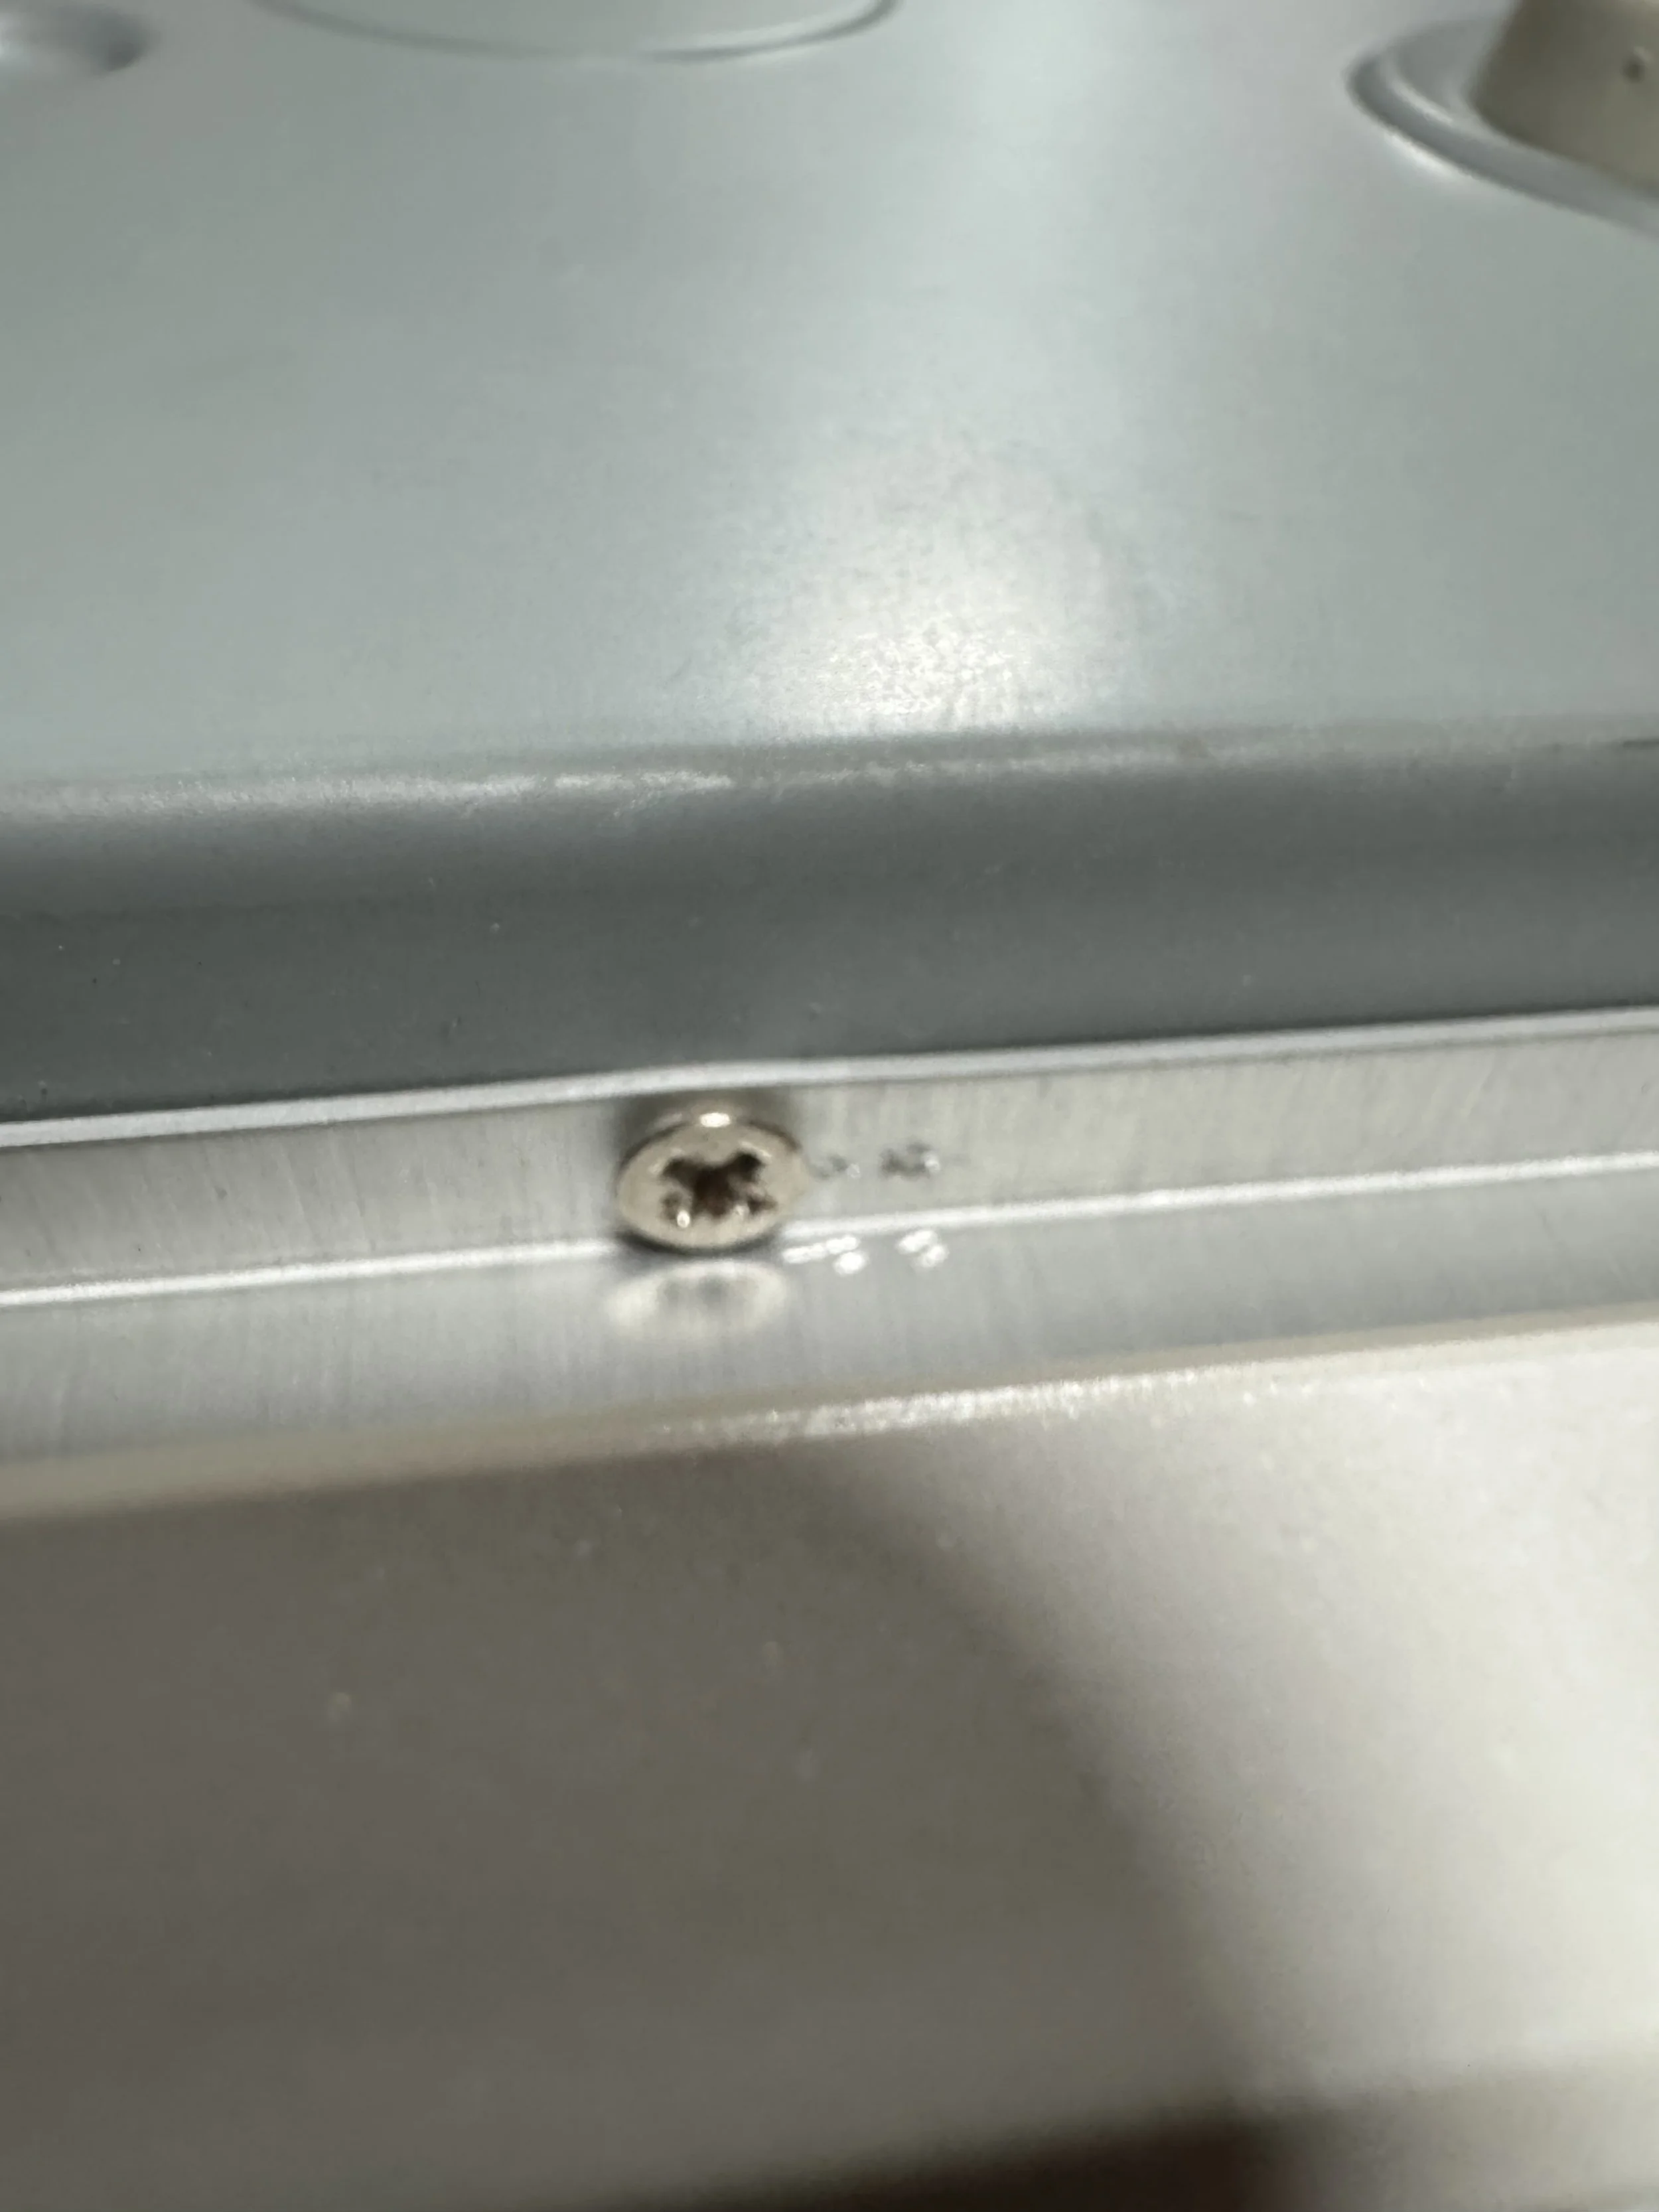
This was on the bottom of the front panel. Absolutely diabolical screw.
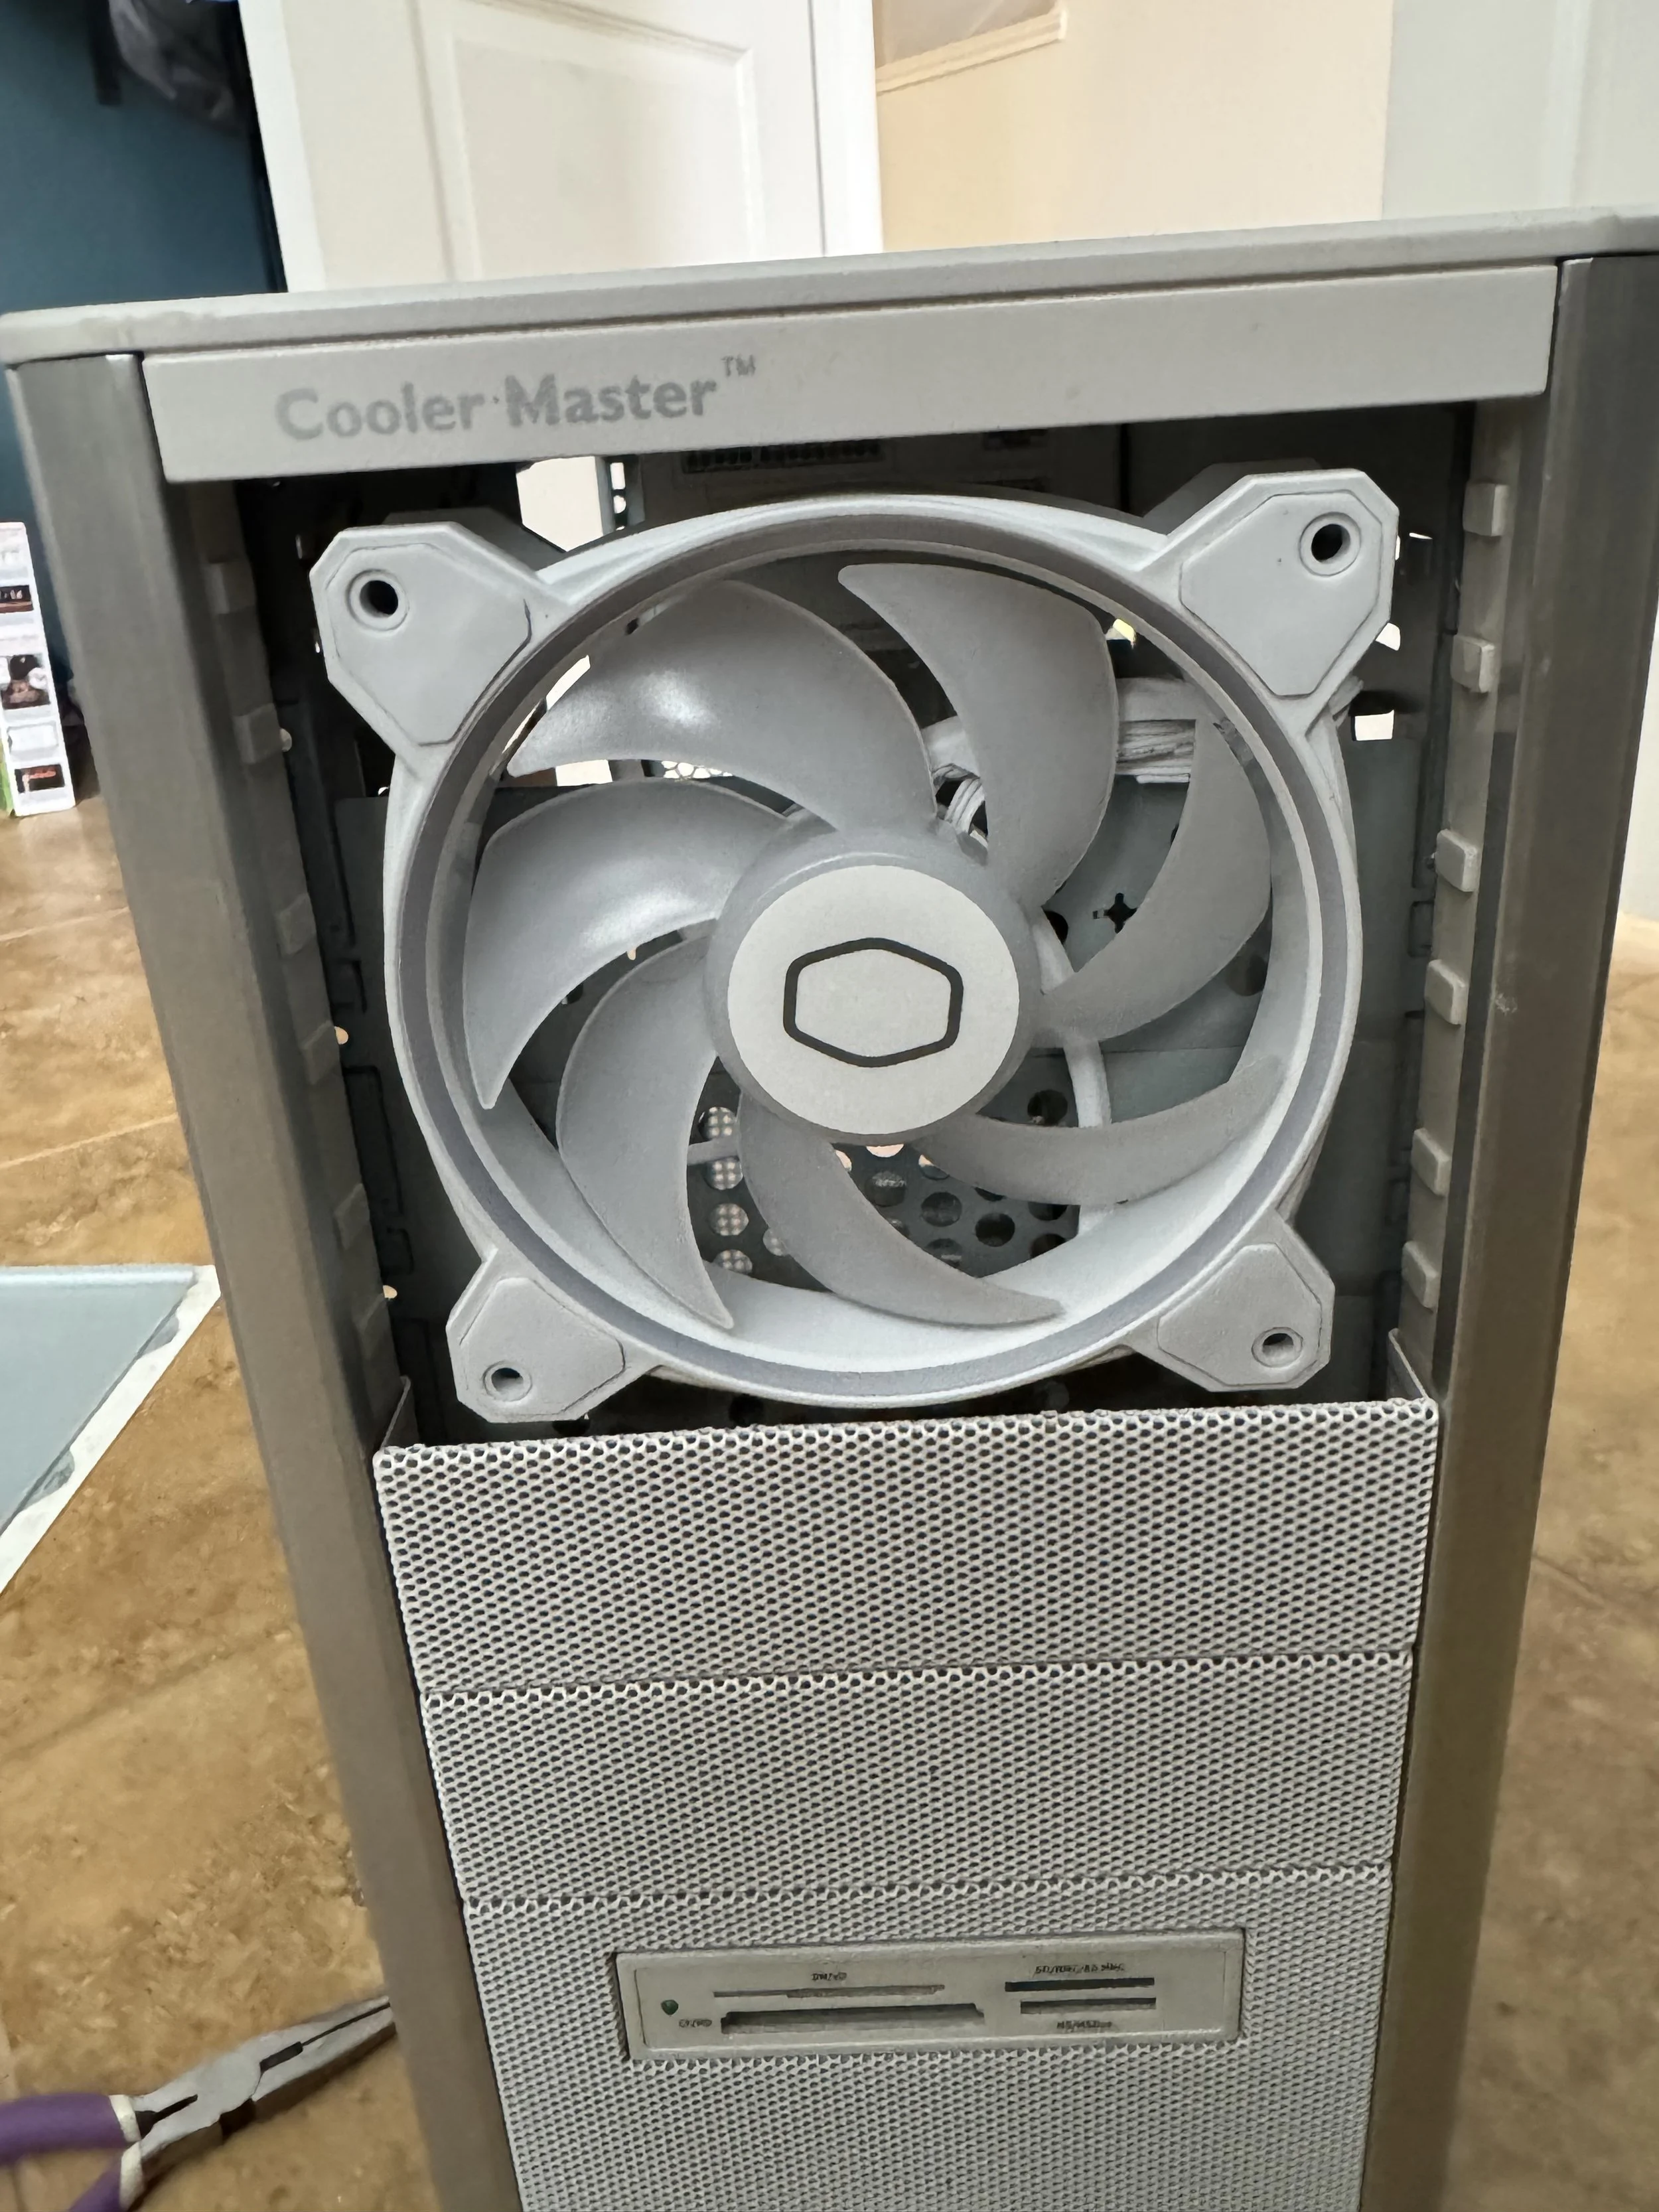
Fan Installed
It was time to put it all together to see what it looks like, along with (trying to) manage some of the old and new cables.

I was a little nervous about the final product, I wasn’t sure that the power button would even work, or something wasn’t fastened correctly.
…But it all worked out.
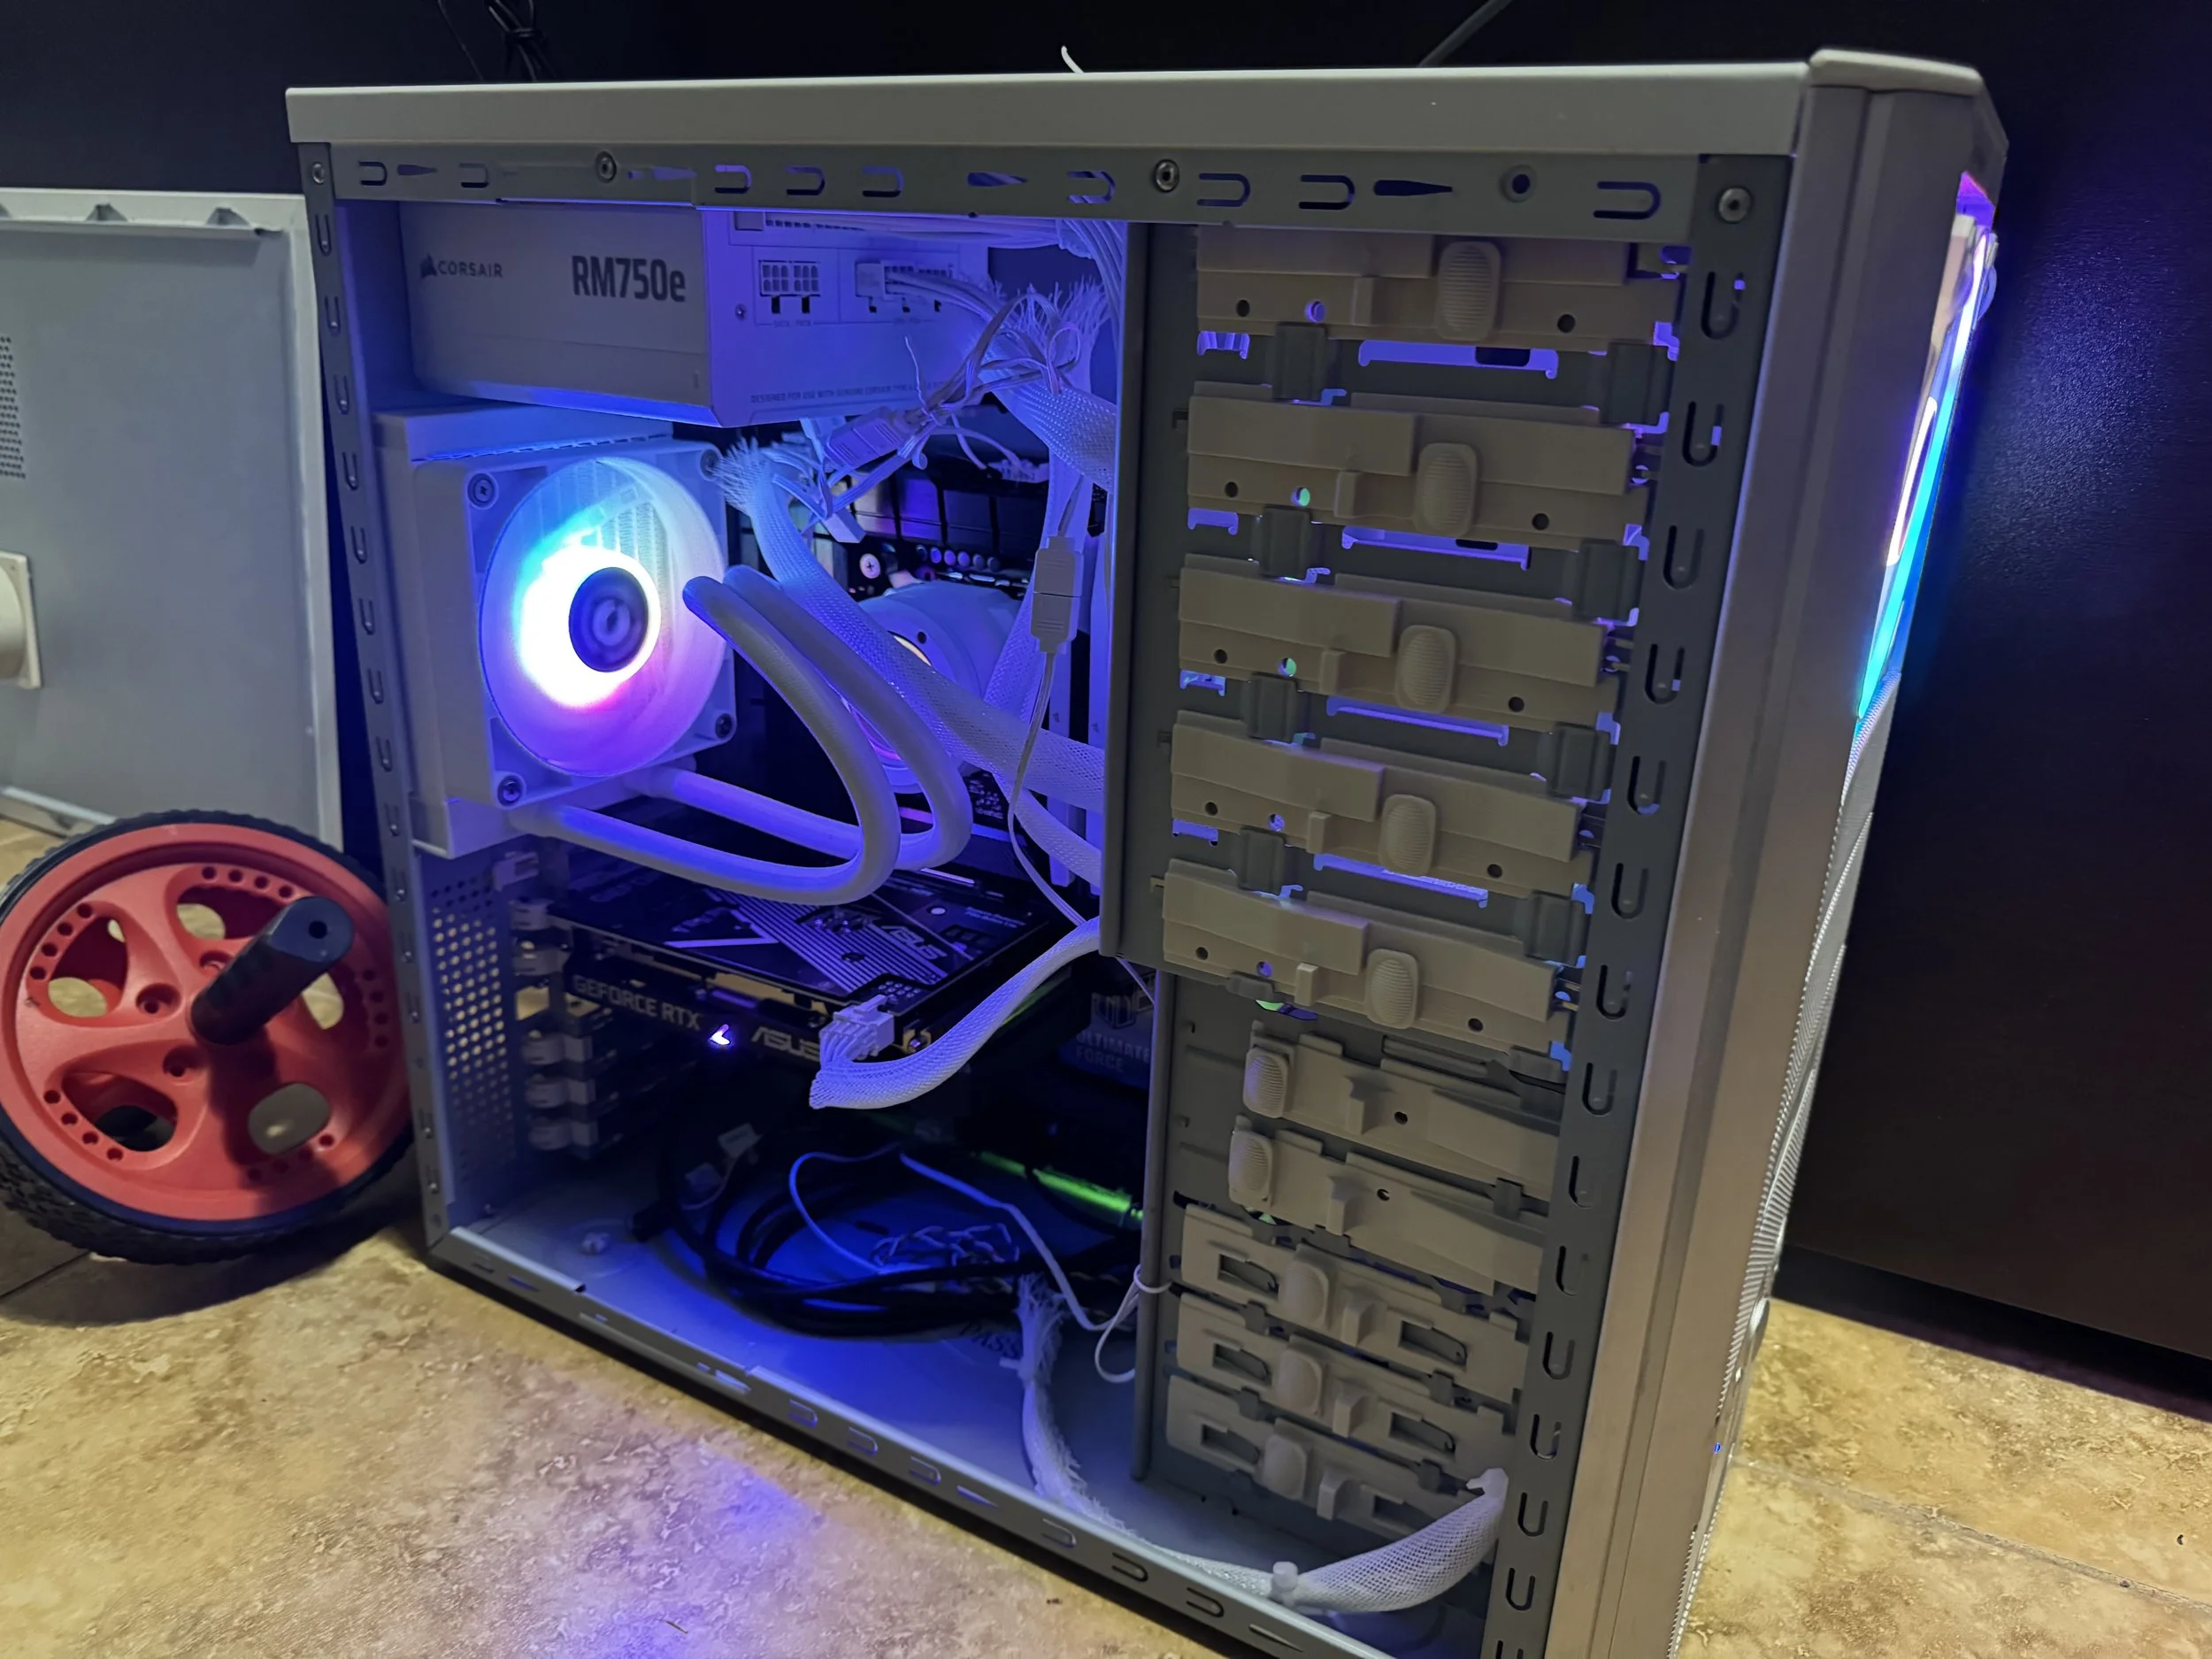
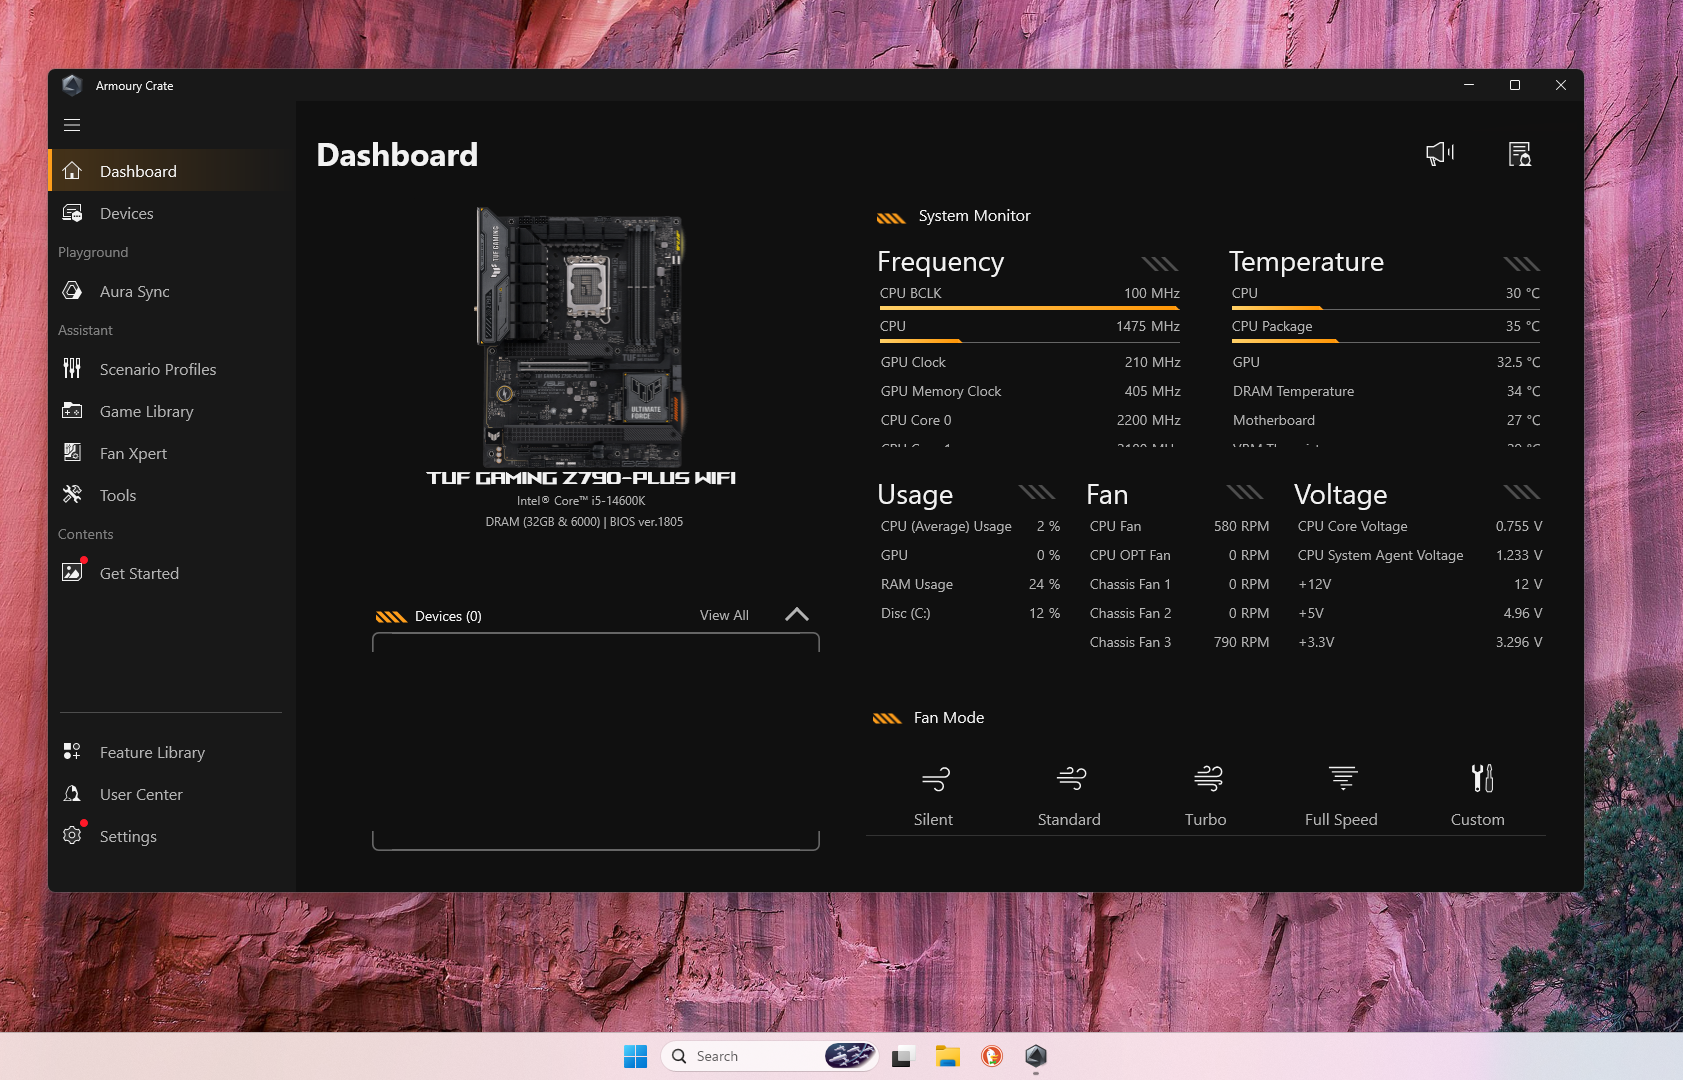
A quick systems check let me know that everything seemed fine from a cooling and power stance as well.
I’ve finally put this case back in service! I’m looking forward to putting the system to good use, both from the gaming and tech perspectives.

Yes, I still have the shirt.