Building with Kiro IDE
I recently obtained access to the Kiro IDE Public Preview. Kiro is a new, AI‑powered development environment from Amazon Web Services (AWS). Kiro takes input from the user and turns it to system designs and tasks, that the user can then turn into actionable implementations of their projects. It also has the ability to import Visual Studio Code (VS Code) extensions, and has a similar look and feel for those who use VS Code normally for development.
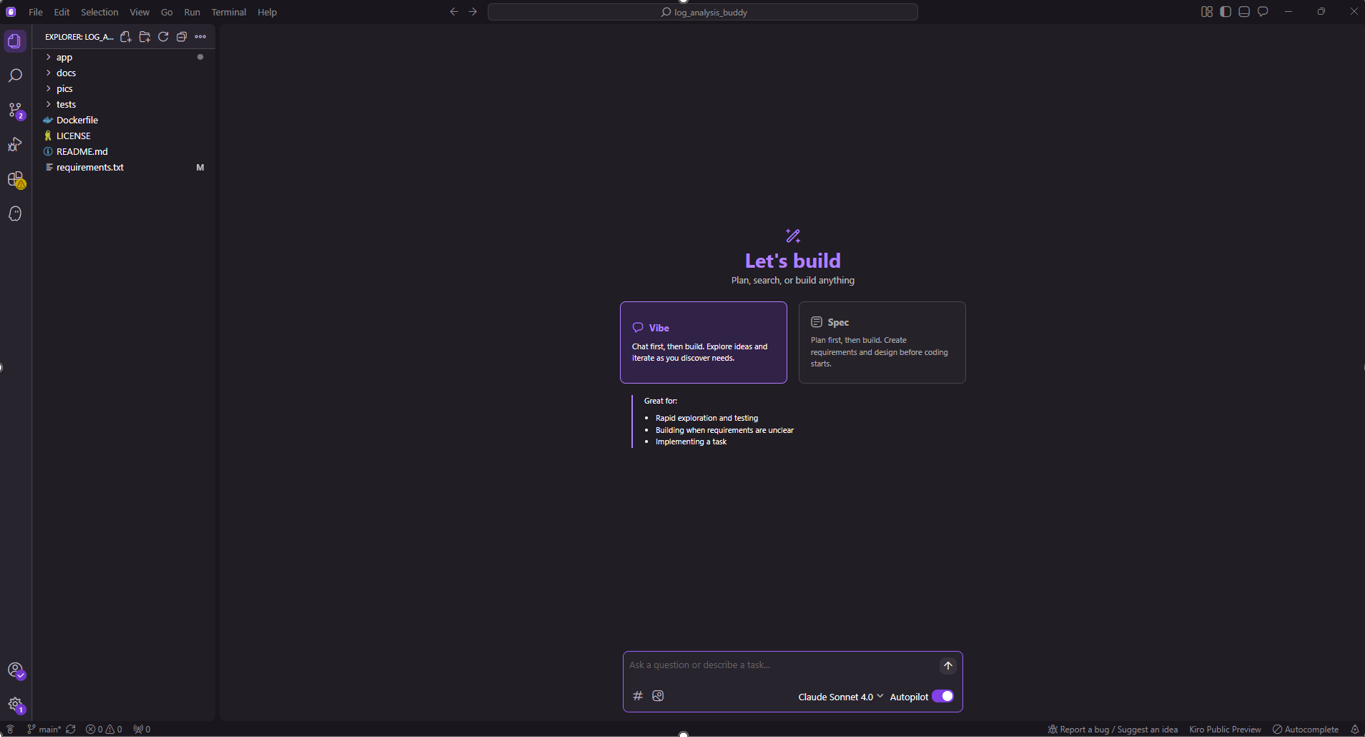
Kiro IDE - New Project
Using Kiro for a Front-End Application Deployment
I am going to use it for one of my projects that requires a public domain name for a front-end application that I’ll be using. The application needs high availability, and using a content delivery network (CDN) with a load balancer provides the setup I need to meet the desired needs.
I’m using Spec mode for this project, since I had a clear set of architectural components in mind. Unlike Vibe mode (which is optimized for fast prototyping), Spec mode generates structured artifacts (requirements.md, design.md, tasks.md) that map user stories into actionable engineering tasks. For example, one of the initial user stories Kiro produced was:
“As an end user, I want my traffic routed through a CDN so that content loads quickly, even under high demand.”
The acceptance criteria ties directly into using Amazon CloudFront as the entry point, followed by an Application Load Balancer (ALB) distributing requests to an EC2 Target Group. This flow is visualized in a Mermaid diagram, with corresponding security groups mapped out for each tier.

Kiro IDE - Initial Requirements Output
The initial output here is in the form of user stories, with clear acceptance criteria, mapped to requirements based on the original ask to Kiro.
Architecture Diagram
With the initial requirements meeting the criteria I am looking for, Kiro moves me into the design phase. Within the design details, it provides a Mermaid diagram to show the components and flow:
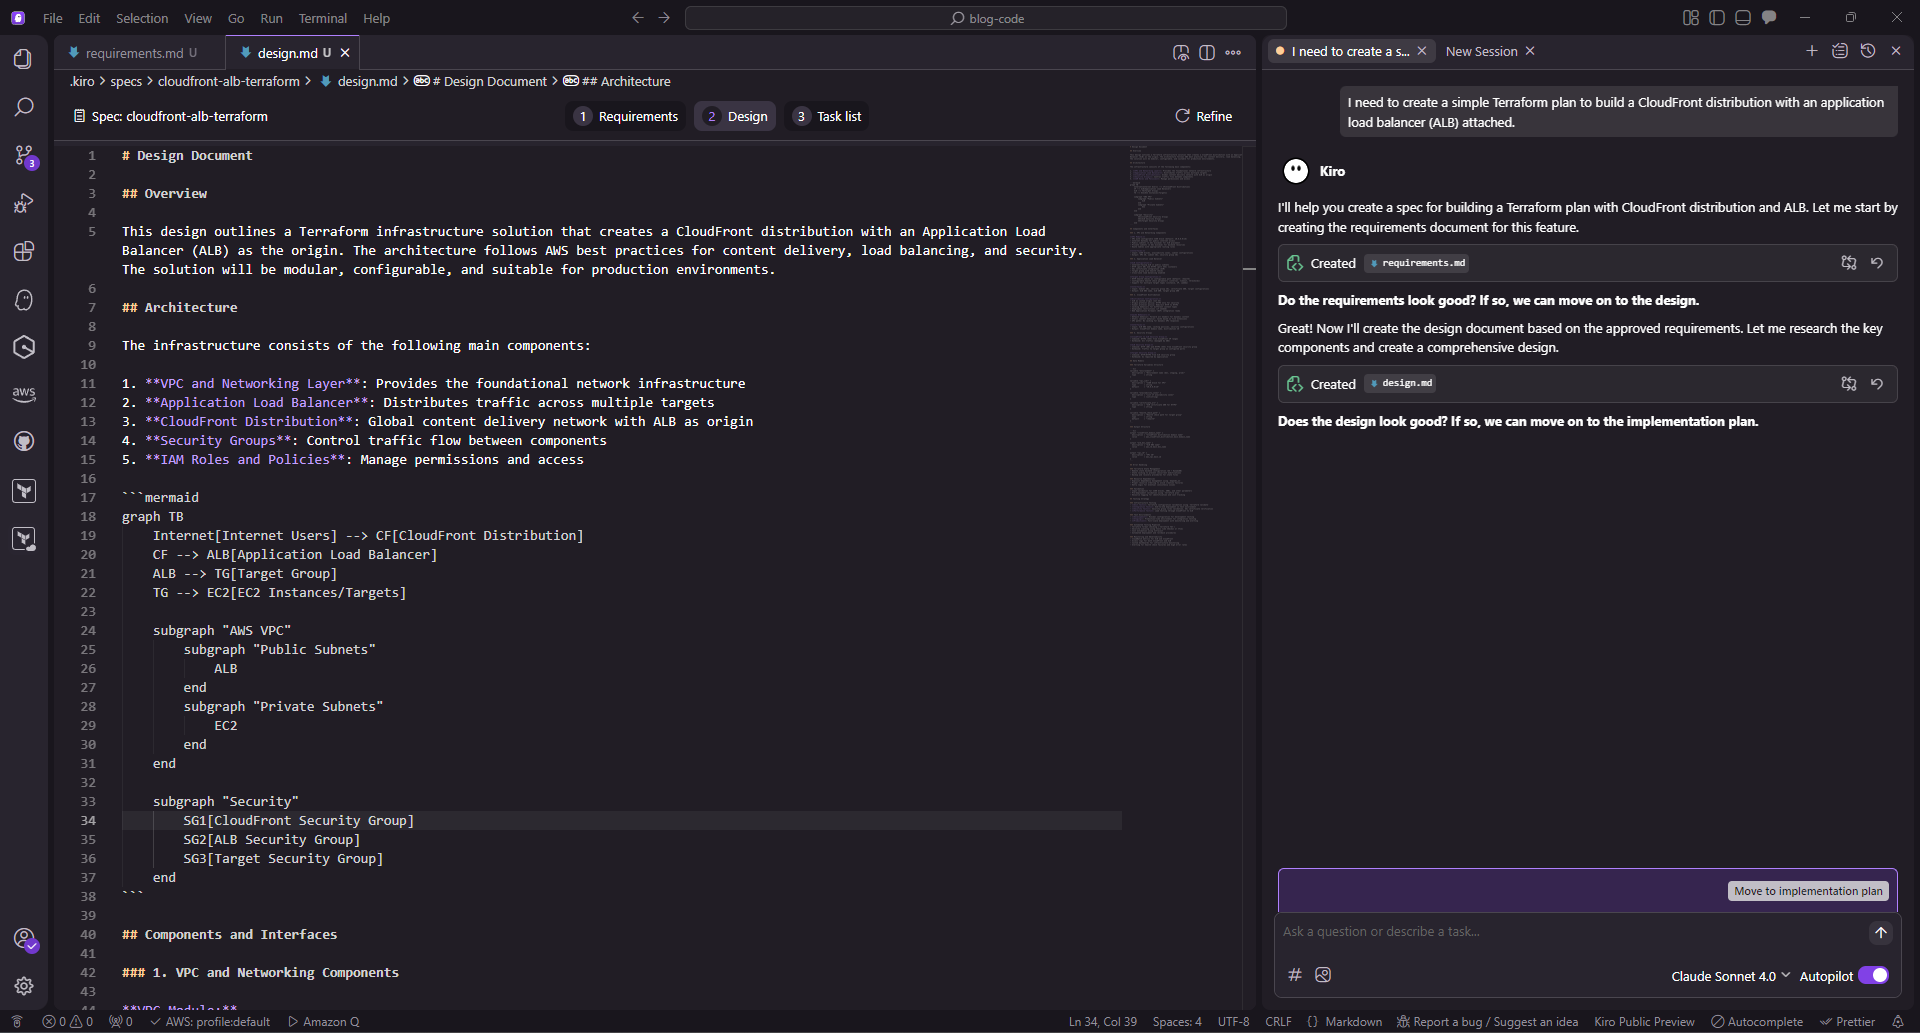
Kiro IDE - Design Output
```mermaid
graph TB
    Internet[Internet Users] --> CF[CloudFront Distribution]
    CF --> ALB[Application Load Balancer]
    ALB --> TG[Target Group]
    TG --> EC2[EC2 Instances/Targets]

    subgraph "AWS VPC"
        subgraph "Public Subnets"
            ALB
        end
        subgraph "Private Subnets"
            EC2
        end
    end

    subgraph "Security"
        SG1[CloudFront Security Group]
        SG2[ALB Security Group]
        SG3[Target Security Group]
    end
```
I decide to validate the diagram on mermaid.js.org to show what the end result looks like as well:

Mermaid - Diagram Output
Enhancing Security
I see the Security aspects within the diagram, although not directly represented as part of the flow within the output. Additionally, for extra security, a web application firewall (WAF) is something that I wanted to apply as well, for protection against common web attacks like web injection, cross site scripting (XSS), or cross site request forgery (CSRF) attacks.
I provided this feedback back to Kiro to see what adjustments could be made.
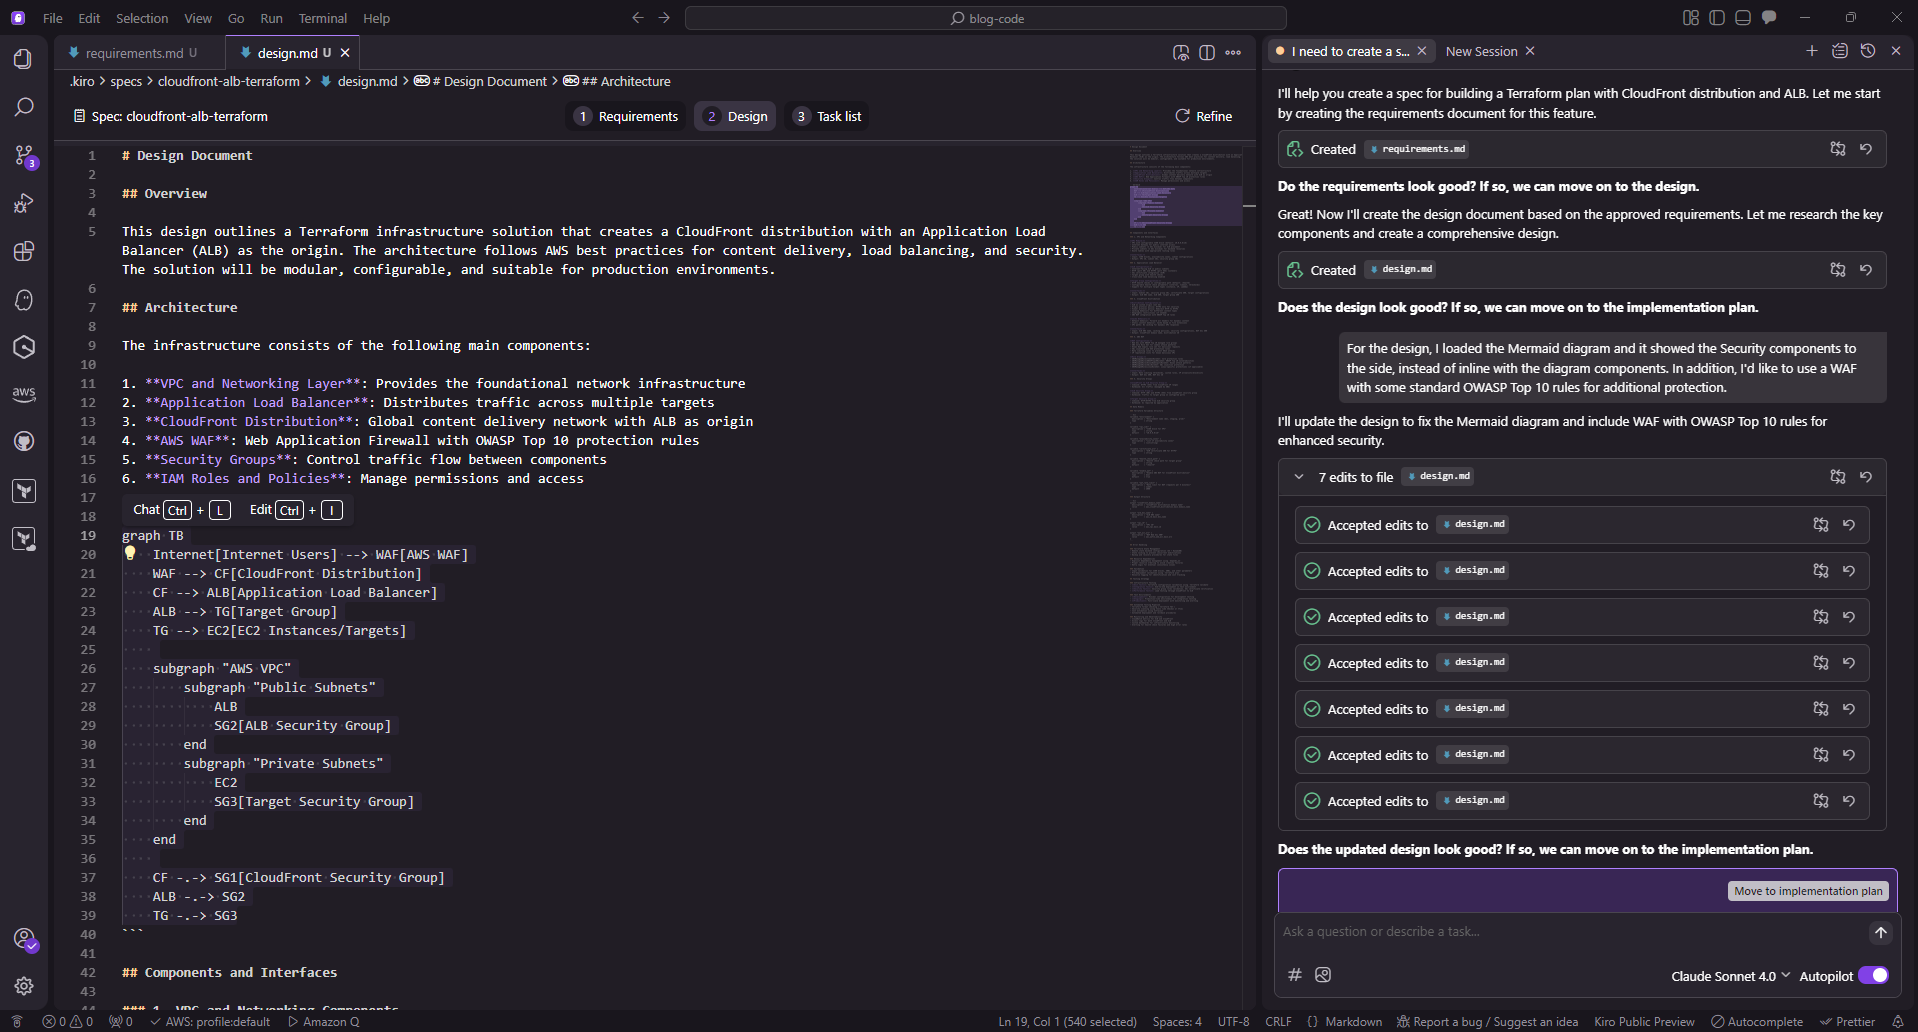
Kiro IDE - Design Output (Revised)
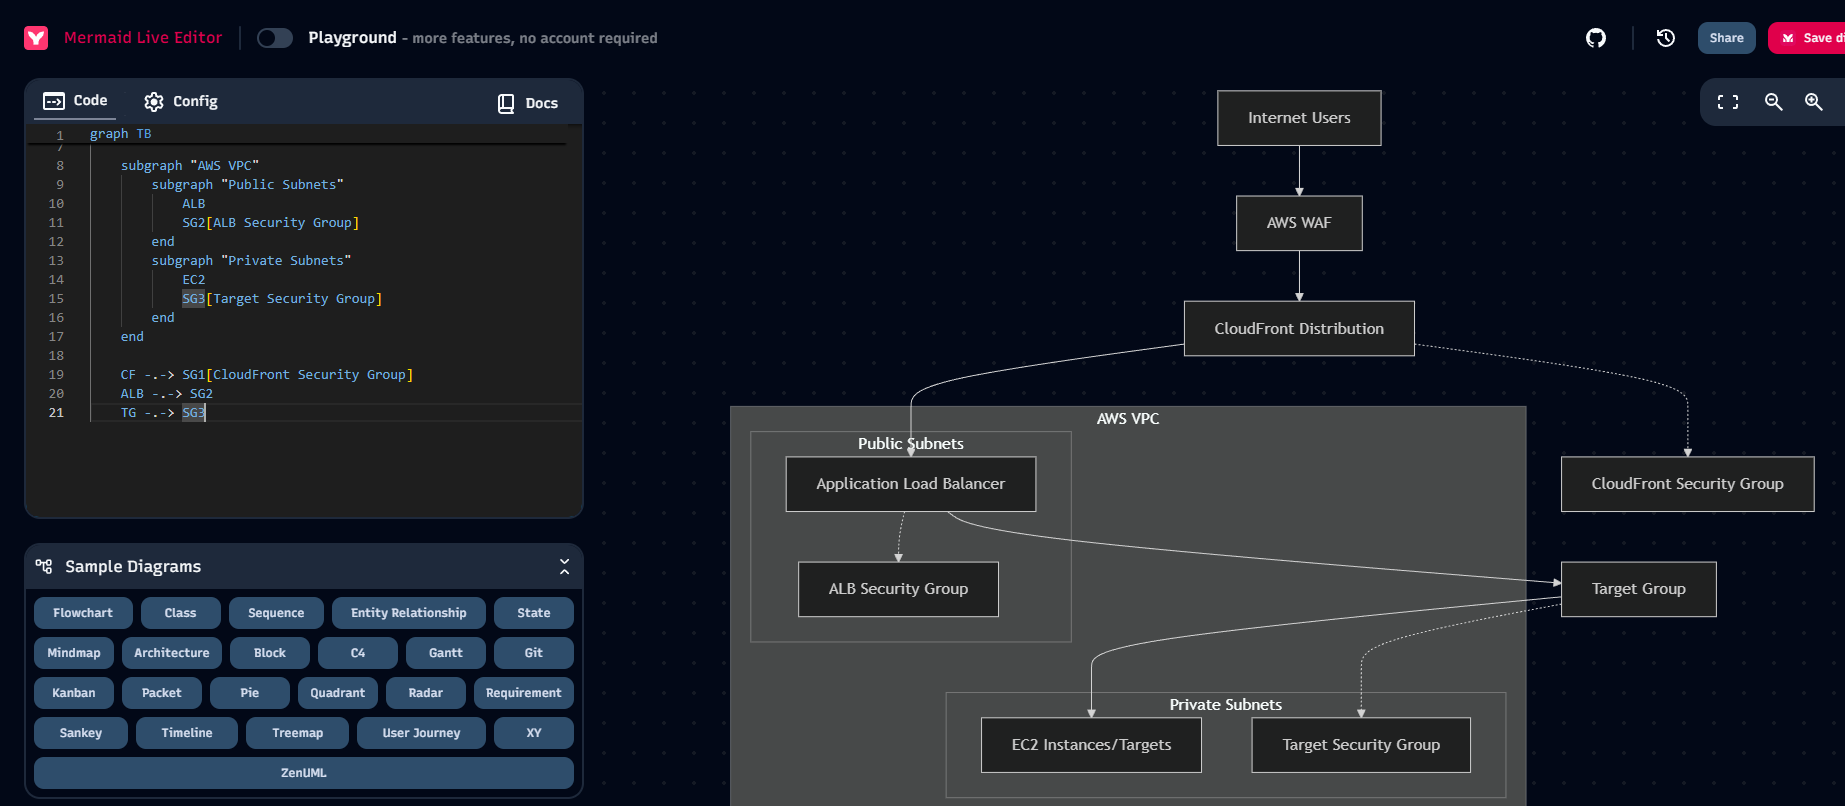
Mermaid - Design Output (Revised)
Task Generation and Execution
Now that we’ve modified our design, we’ll move on to the task list. Kiro provide tasks with direct requirement mappings from our original list of requirements. Each task includes detailed implementation steps.
Example tasks:
Generate Terraform for the CloudFront distribution and ALB.
Configure EC2 launch templates and auto-scaling groups.
Apply security group rules for ingress/egress.
Create WAF rule sets.
Add a task for tearing down the environment when testing is complete.
Kiro also provides a Start Task option, letting me execute tasks interactively inside the IDE.
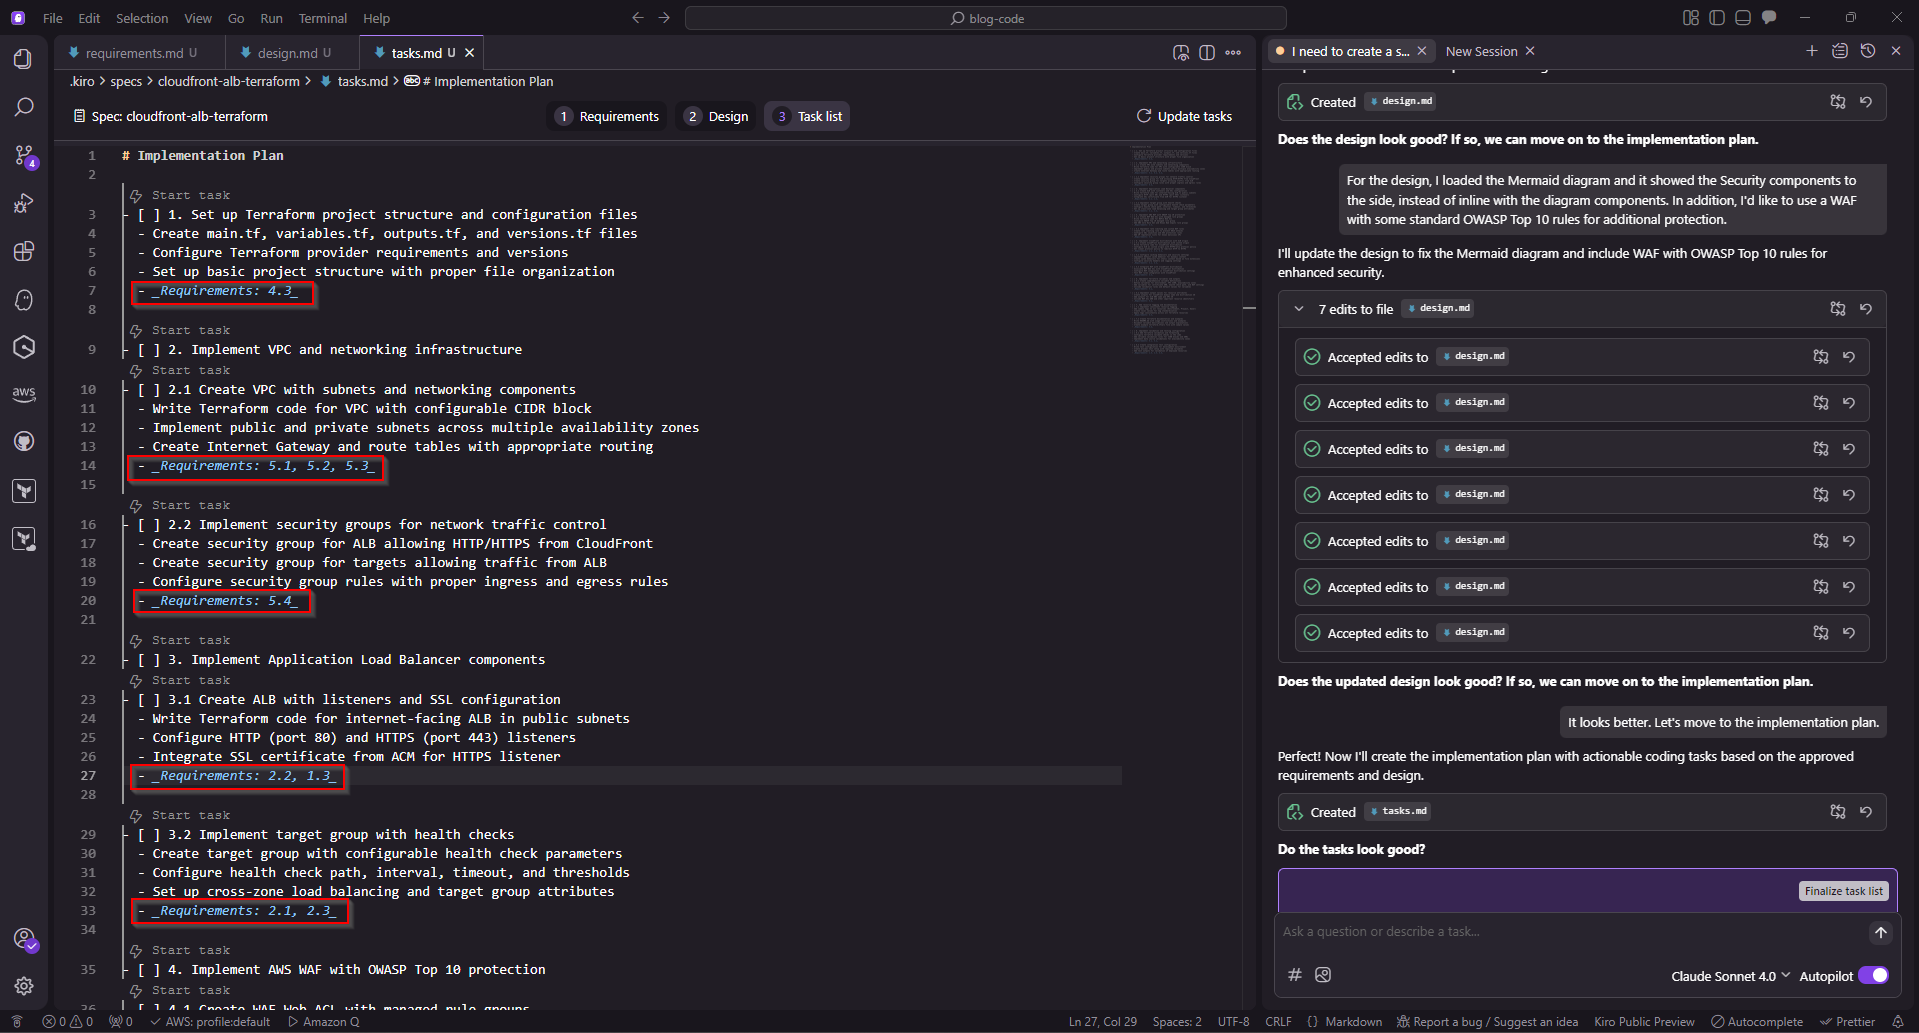
Kiro IDE - Requirement Mappings & Start Task
Before I started running tasks, I had to ensure that I had Terraform installed locally on my system, as we’ll be using it to configure and validate our resources. I also had Kiro create an additional task to destroy the infrastructure created to avoid incurring unnecessary costs during our experimentation.
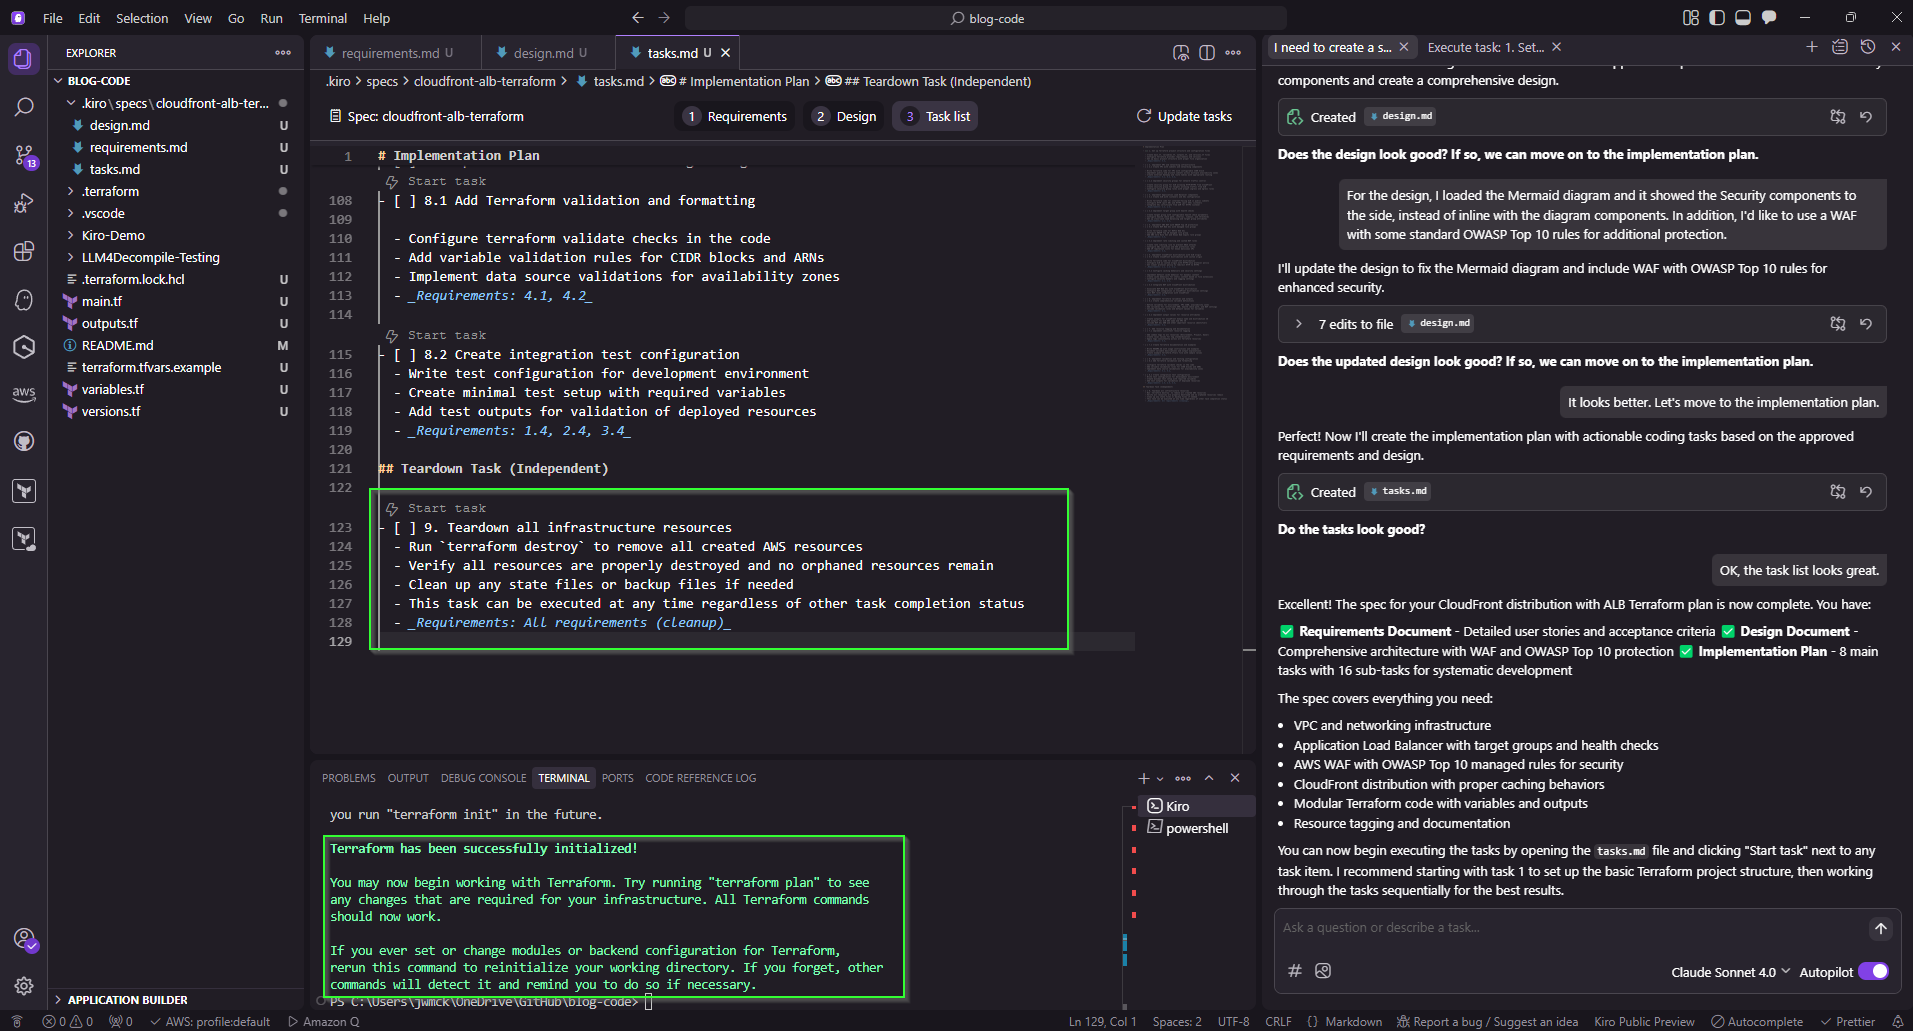
Kiro IDE - Terraform Initialized & Terraform Destroy Task
Kiro is now ready to configure and validate the Terraform code we’ve created together!
There is a specific constraint on deploying infrastructure here, to avoid experimentation costs in AWS. However, I can see the validation of code, and when I’m ready, I can use `terraform apply` manually to begin my deployment:
terraform init
terraform plan
terraform apply
I’ll begin with going through the task list and validating the code:
For each task, Kiro outputs the details of each task and what implementation details are involved:
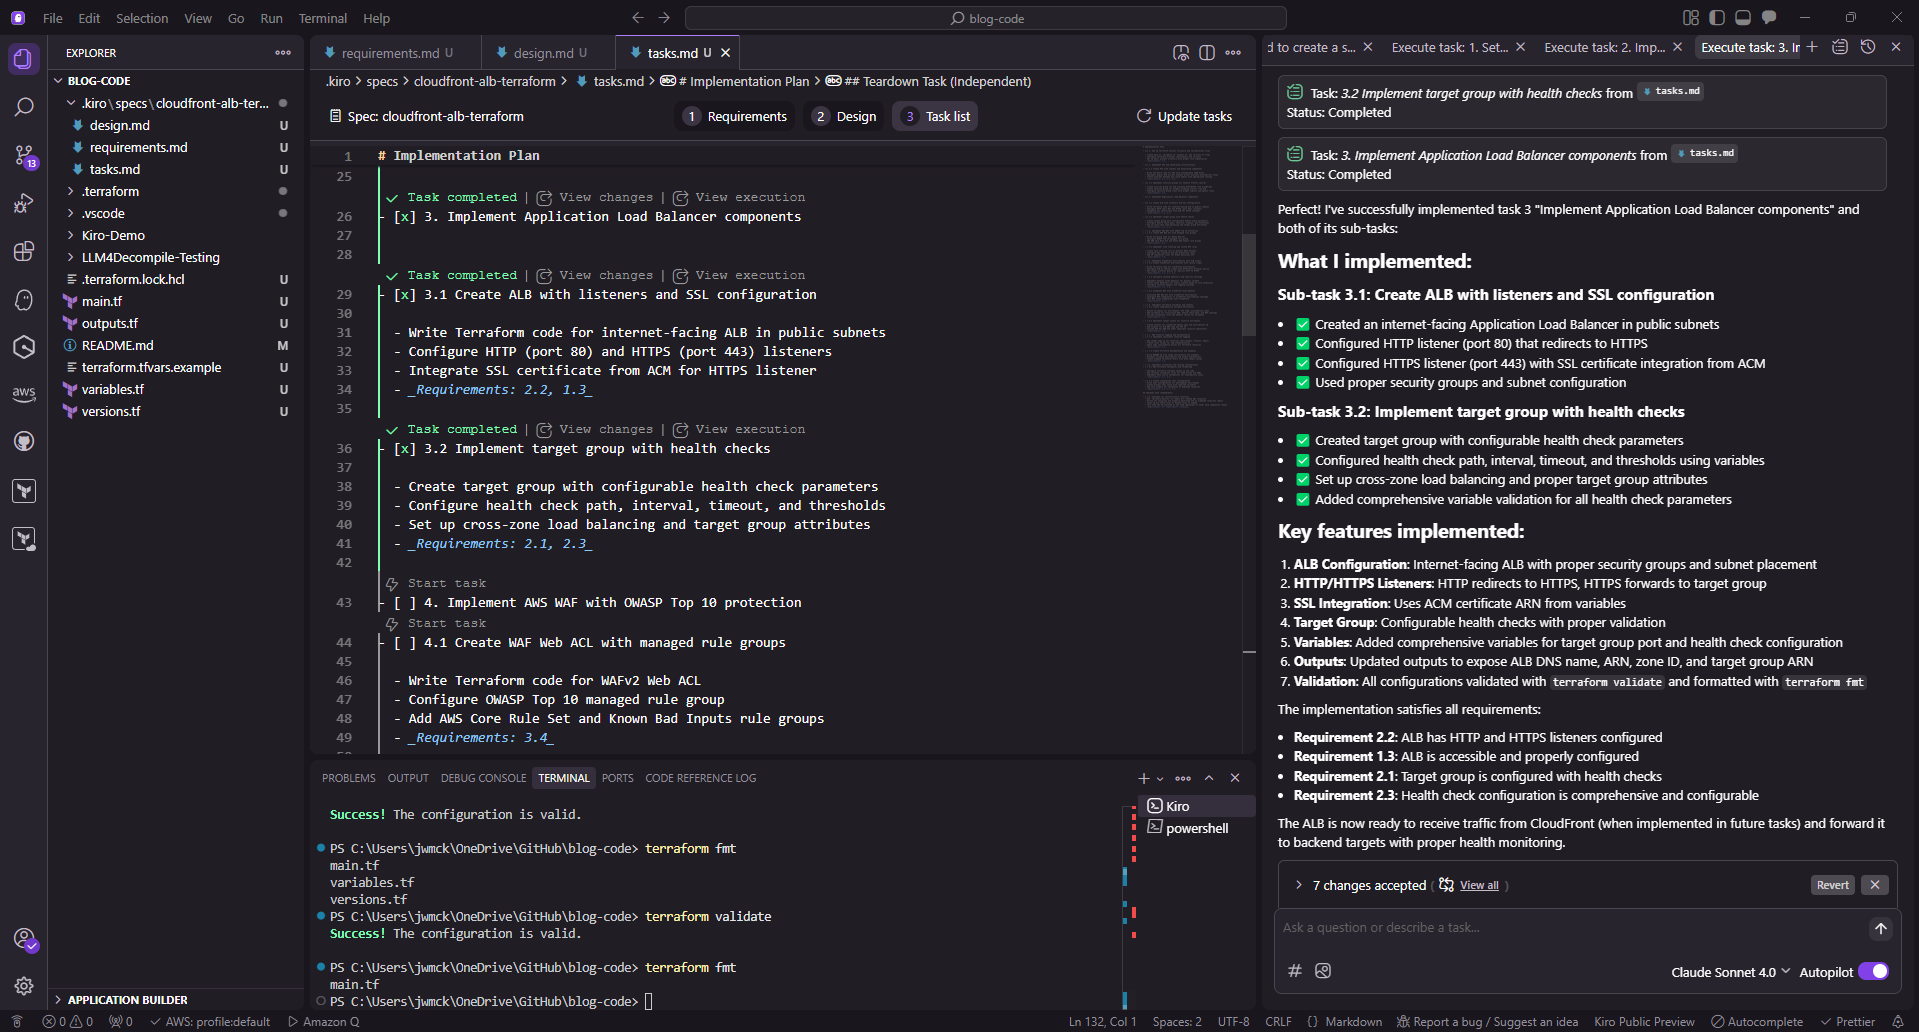
Kiro IDE - Task Output
Key Benefits Observed
Using Kiro, I’m able to quickly provide a simple specification for infrastructure, and have full Terraform code to deploy in minutes. This saves time for writing custom deployments, and also allows me to create reusable code for additional projects that I’ll be building.
Some of the key benefits of using Kiro for my deployment:
Rapid Prototyping with Specs: I move from a high-level prompt to requirements, design, and Terraform code in minutes.
Security by Default: Security groups are auto-included, with the option to add WAF rules easily.
IaC Integration: Generated Terraform is reusable across other projects.
Familiar Developer Experience: With VS Code extensions supported, I can use tools like Terraform linting, YAML validation, or Git integration without leaving Kiro.
Feedback Loop: Kiro responds to adjustments (e.g., adding WAF) and iteratively updates designs and tasks.
Wrap-Up
With Kiro, I quickly transform simple specifications into production-ready infrastructure code. It eliminates repetitive manual coding, provides a structured development flow, and allows me to validate and iterate on cloud architecture with ease.
With the addition of being a long time VS Code user, and the familiarity that Kiro brings, I’m looking forward to using Kiro for some more detailed projects and experiments!
Have you started using Kiro yet? What are your thoughts so far? Please feel free to reach out and tell me about it!